Pokemotion
The Pokemotion is a toy released by Nintendo Network Services Development. When turned on and waved back and forth, the LEDs create images of Pokemon.
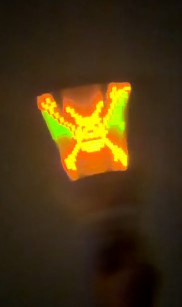
Table of contents
Information
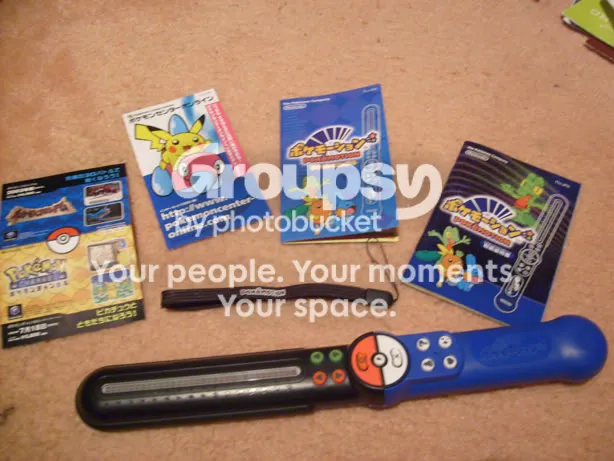
The Pokemotion came in a plastic case with adverts for the games, the Pokemon Center site, a guide for the options, and a full instruction manual. You can see it laid out in this Livejournal post from Kazzi:
There are several videos out there demonstrating the Pokemotion. I like this one from Steve's Retro Loft, which shows the manual (unfortunately, Steve never got around to digitizing the manual - perhaps it will pop up one day!). This Japanese video demonstrates many of the Pokemon in the Pokemotion.
A fun fact: the Pokemotion was used to test the WiiMotion Plus! Or rather, the store display was. There appears to have been a store display in Japanese stores that would swing the Pokemotion back and forth to demonstrate the images. These store displays were used to test the Wii MotionPlus to make sure it wouldn't become disconnected. I wonder if anyone has any photos of these displays...
Pokemotion requires 3 AAA batteries.
Pokemon List
| Red | Green | Pokemon |
|---|---|---|
| 1 | 1 | Treecko |
| 1 | 2 | Grovyle |
| 1 | 3 | Sceptile |
| 1 | 4 | Torchic |
| 1 | 5 | Combusken |
| 1 | 6 | Blaziken |
| 1 | 7 | Mudkip |
| 1 | 8 | Marshtomp |
| 1 | 9 | Swampert |
| 1 | 10 | Poochyena |
| 1 | 11 | Mightyena |
| 1 | 12 | Zigzagoon |
| 1 | 13 | Linoone |
| 1 | 14 | Wurmple |
| 1 | 15 | Silcoon |
| 1 | 16 | Beautifly |
| 2 | 1 | Cascoon |
| 2 | 2 | Dustox |
| 2 | 3 | Lotad |
| 2 | 4 | Lombre |
| 2 | 5 | Ludicolo |
| 2 | 6 | Seedot |
| 2 | 7 | Nuzleaf |
| 2 | 8 | Shiftry |
| 2 | 9 | Tailow |
| 2 | 10 | Swellow |
| 2 | 11 | Wingull |
| 2 | 12 | Pelipper |
| 2 | 13 | Ralts |
| 2 | 14 | Kirlia |
| 2 | 15 | Gardevoir |
| 2 | 16 | Surskit |
| 3 | 1 | Masquerain |
| 3 | 2 | Shroomish |
| 3 | 3 | Breloom |
| 3 | 4 | Slakoth |
| 3 | 5 | Vigoroth |
| 3 | 6 | Slakoth |
| 3 | 7 | Abra |
| 3 | 8 | Kadabra |
| 3 | 9 | Alakazam |
| 3 | 10 | Nincada |
| 3 | 11 | Ninjask |
| 3 | 12 | Shedinja |
| 3 | 13 | Whismur |
| 3 | 14 | Loudred |
| 3 | 15 | Exploud |
| 3 | 16 | Makuhita |
| 4 | 1 | Hariyama |
| 4 | 2 | Goldeen |
| 4 | 3 | Seaking |
| 4 | 4 | Magikarp |
| 4 | 5 | Gyarados |
| 4 | 6 | Azurill |
| 4 | 7 | Marill |
| 4 | 8 | Azumarill |
| 4 | 9 | Geodude |
| 4 | 10 | Graveler |
| 4 | 11 | Golem |
| 4 | 12 | Nosepass |
| 4 | 13 | Skitty |
| 4 | 14 | Delcatty |
| 4 | 15 | Zubat |
| 4 | 16 | Golbat |
| 5 | 1 | Crobat |
| 5 | 2 | Tentacool |
| 5 | 3 | Tentacruel |
| 5 | 4 | Sableye |
| 5 | 5 | Mawhile |
| 5 | 6 | Aron |
| 5 | 7 | Lairon |
| 5 | 8 | Aggron |
| 5 | 9 | Machop |
| 5 | 10 | Machoke |
| 5 | 11 | Machamp |
| 5 | 12 | Meditite |
| 5 | 13 | Medicham |
| 5 | 14 | Electrike |
| 5 | 15 | Manetric |
| 5 | 16 | Plusle |
| 6 | 1 | Minun |
| 6 | 2 | Magnemite |
| 6 | 3 | Magneton |
| 6 | 4 | Voltorb |
| 6 | 5 | Electrode |
| 6 | 6 | Volbeat |
| 6 | 7 | Illumise |
| 6 | 8 | Oddish |
| 6 | 9 | Gloom |
| 6 | 10 | Vileplume |
| 6 | 11 | Bellossom |
| 6 | 12 | Doduo |
| 6 | 13 | Dodrio |
| 6 | 14 | Roselia |
| 6 | 15 | Gulpin |
| 6 | 16 | Swalot |
| 7 | 1 | Carvanha |
| 7 | 2 | Sharpedo |
| 7 | 3 | Wailmer |
| 7 | 4 | Wailord |
| 7 | 5 | Numel |
| 7 | 6 | Camerupt |
| 7 | 7 | Slugma |
| 7 | 8 | Magcargo |
| 7 | 9 | Torkoal |
| 7 | 10 | Grimer |
| 7 | 11 | Muk |
| 7 | 12 | Koffing |
| 7 | 13 | Weezing |
| 7 | 14 | Spoink |
| 7 | 15 | Grumpig |
| 7 | 16 | Sandshrew |
| 8 | 1 | Sandslash |
| 8 | 2 | Spinda |
| 8 | 3 | Skarmory |
| 8 | 4 | Trapinch |
| 8 | 5 | Vibrava |
| 8 | 6 | Flygon |
| 8 | 7 | Cacnea |
| 8 | 8 | Cacturne |
| 8 | 9 | Swablu |
| 8 | 10 | Altaria |
| 8 | 11 | Zangoose |
| 8 | 12 | Seviper |
| 8 | 13 | Lunatone |
| 8 | 14 | Solrock |
| 8 | 15 | Barboach |
| 8 | 16 | Whiscash |
| 9 | 1 | Corphish |
| 9 | 2 | Crawdaunt |
| 9 | 3 | Baltoy |
| 9 | 4 | Claydol |
| 9 | 5 | Lileep |
| 9 | 6 | Cradily |
| 9 | 7 | Anorith |
| 9 | 8 | Armaldo |
| 9 | 9 | Igglybuff |
| 9 | 10 | Jigglybuff |
| 9 | 11 | Wigglytuff |
| 9 | 12 | Feebas |
| 9 | 13 | Milotic |
| 9 | 14 | Castform |
| 9 | 15 | Staryu |
| 9 | 16 | Starmie |
| 10 | 1 | Kecleon |
| 10 | 2 | Shuppet |
| 10 | 3 | Banette |
| 10 | 4 | Duskull |
| 10 | 5 | Dusclops |
| 10 | 6 | Tropius |
| 10 | 7 | Chimecho |
| 10 | 8 | Absol |
| 10 | 9 | Vulpix |
| 10 | 10 | Ninetales |
| 10 | 11 | Pichu |
| 10 | 12 | Pikachu |
| 10 | 13 | Raichu |
| 10 | 14 | Psyduck |
| 10 | 15 | Golduck |
| 10 | 16 | Wynaut |
| 11 | 1 | Wobbuffet |
| 11 | 2 | Natu |
| 11 | 3 | Xatu |
| 11 | 4 | Girafarig |
| 11 | 5 | Phanphy |
| 11 | 6 | Donphan |
| 11 | 7 | Pinsir |
| 11 | 8 | Heracross |
| 11 | 9 | Rhyhorn |
| 11 | 10 | Rhydon |
| 11 | 11 | Snorunt |
| 11 | 12 | Glalie |
| 11 | 13 | Spheal |
| 11 | 14 | Sealeo |
| 11 | 15 | Walrein |
| 11 | 16 | Clamperl |
| 12 | 1 | Huntail |
| 12 | 2 | Gorebyss |
| 12 | 3 | Relicanth |
| 12 | 4 | Corsola |
| 12 | 5 | Chinchou |
| 12 | 6 | Lanturn |
| 12 | 7 | Luvdisc |
| 12 | 8 | Horsea |
| 12 | 9 | Seadra |
| 12 | 10 | Kingdra |
| 12 | 11 | Bagon |
| 12 | 12 | Shelgon |
| 12 | 13 | Salamence |
| 12 | 14 | Beldum |
| 12 | 15 | Metang |
| 12 | 16 | Metagross |
How it works
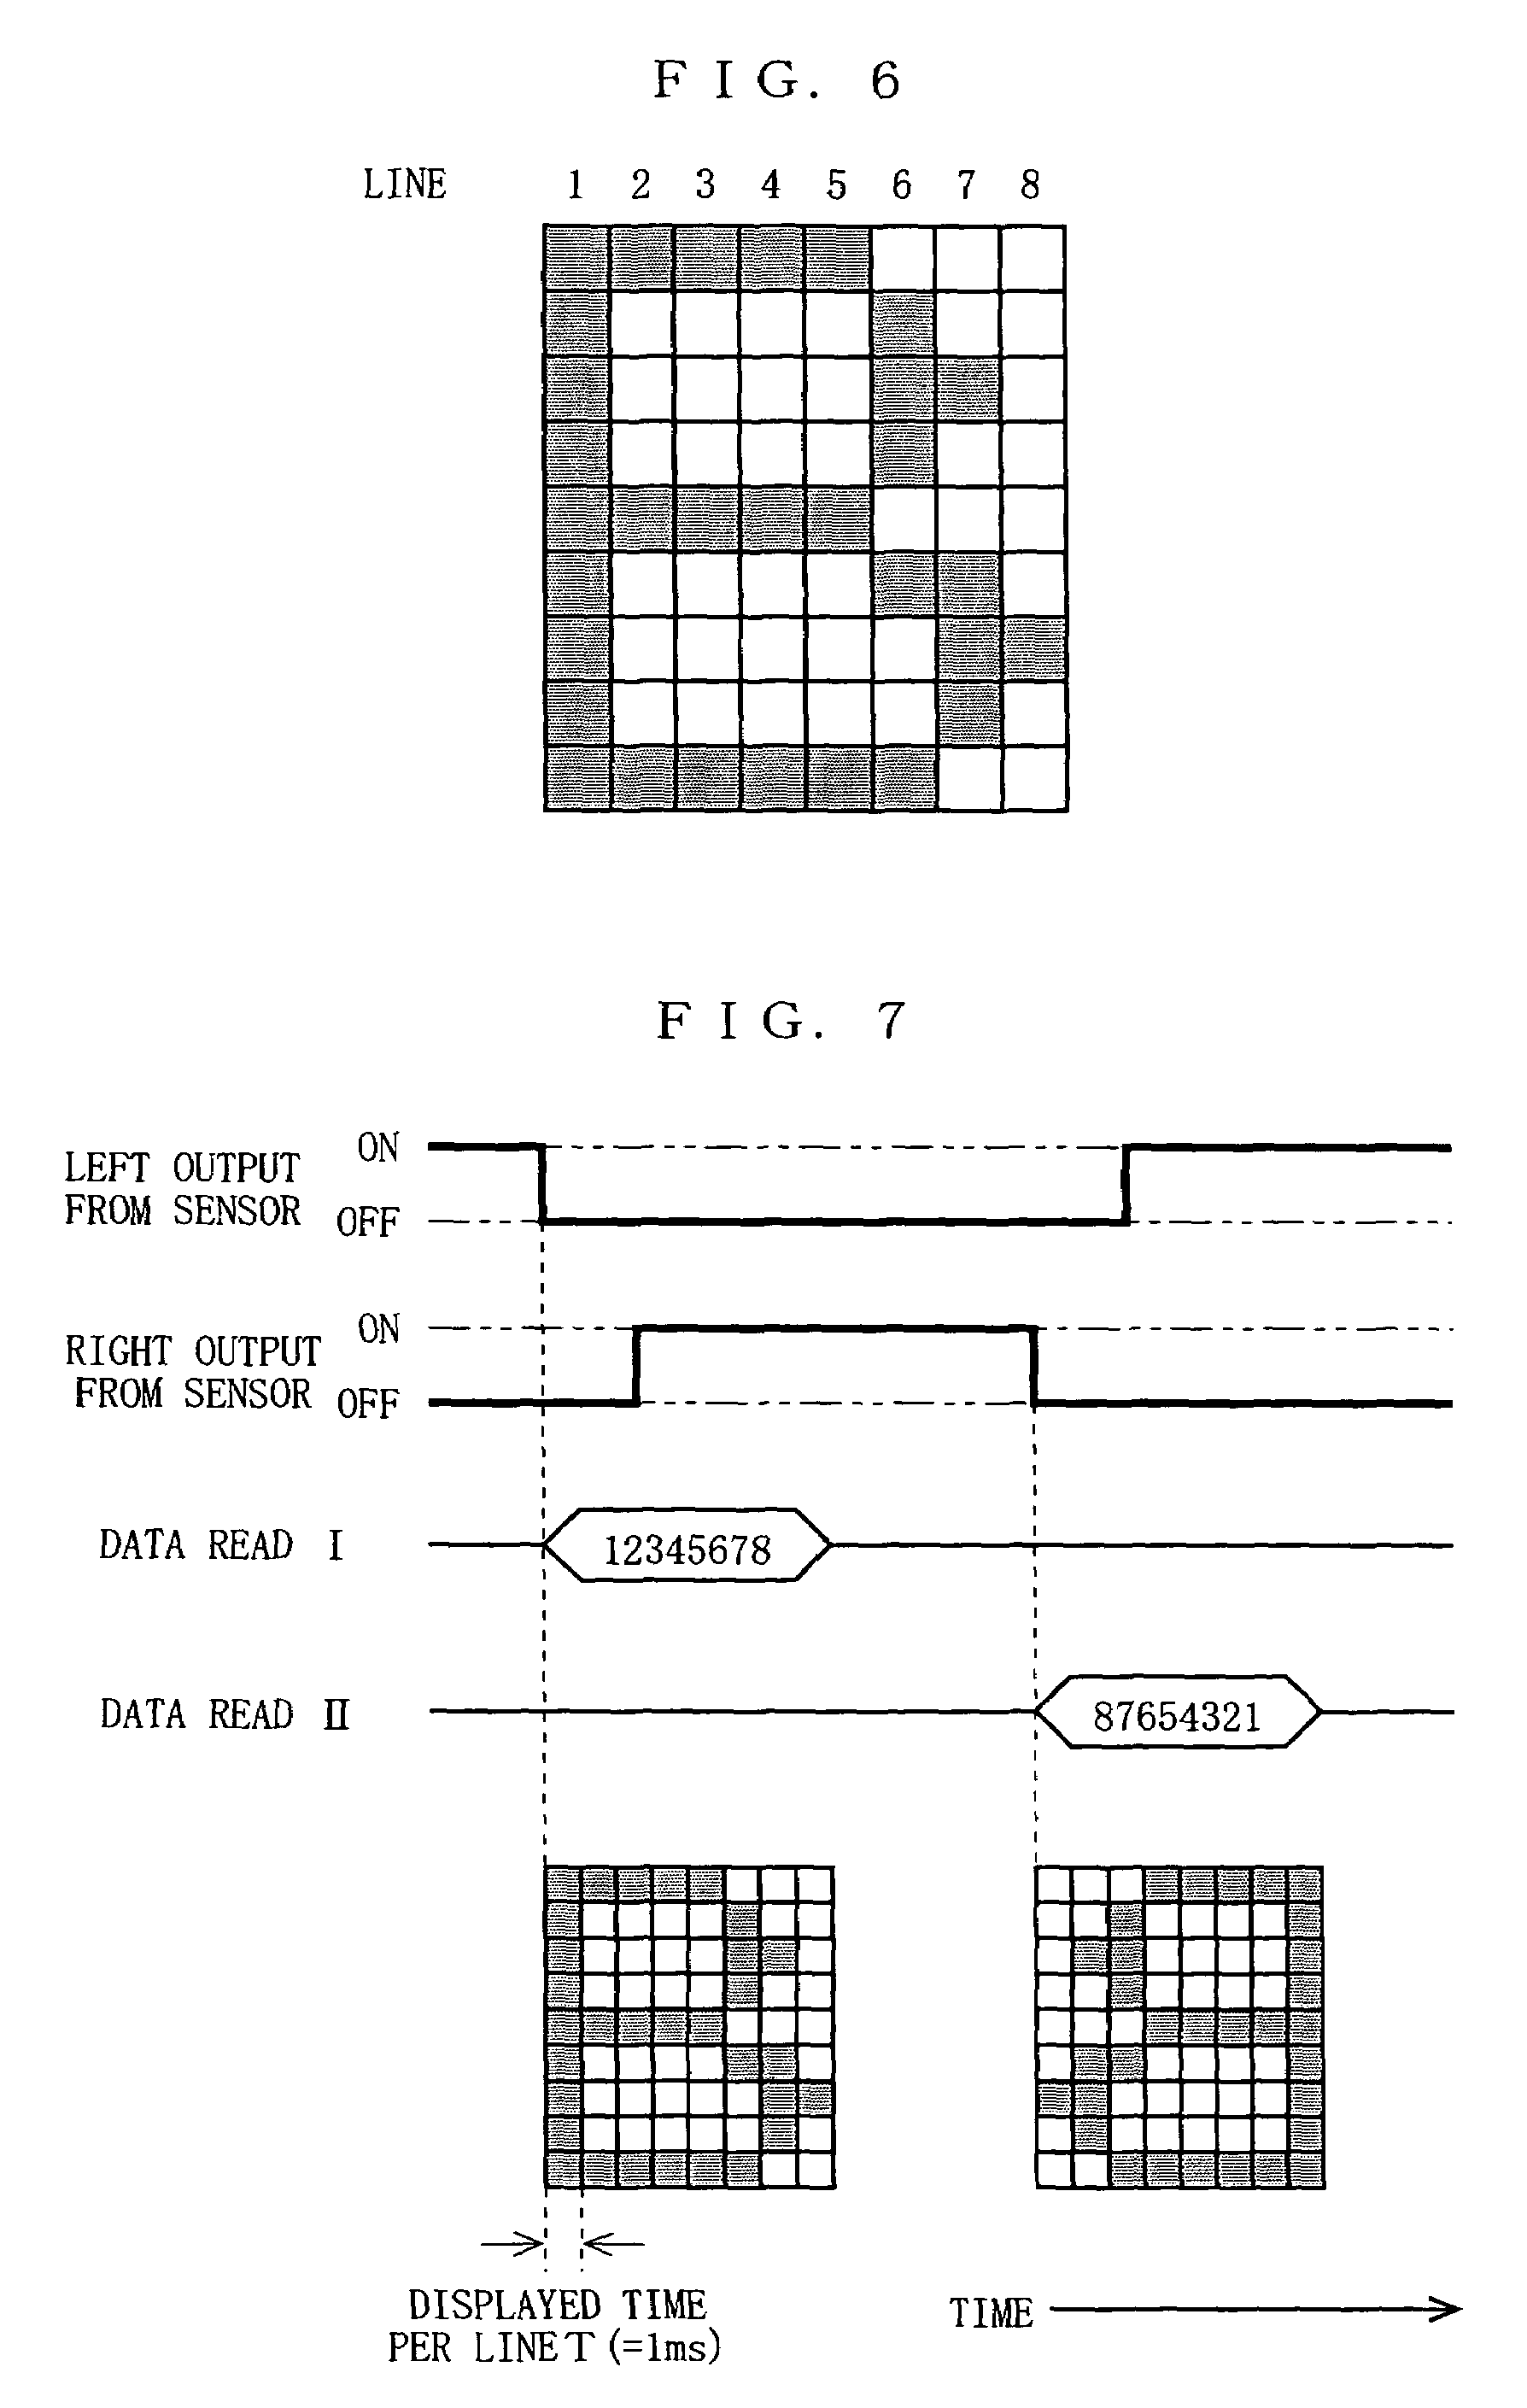
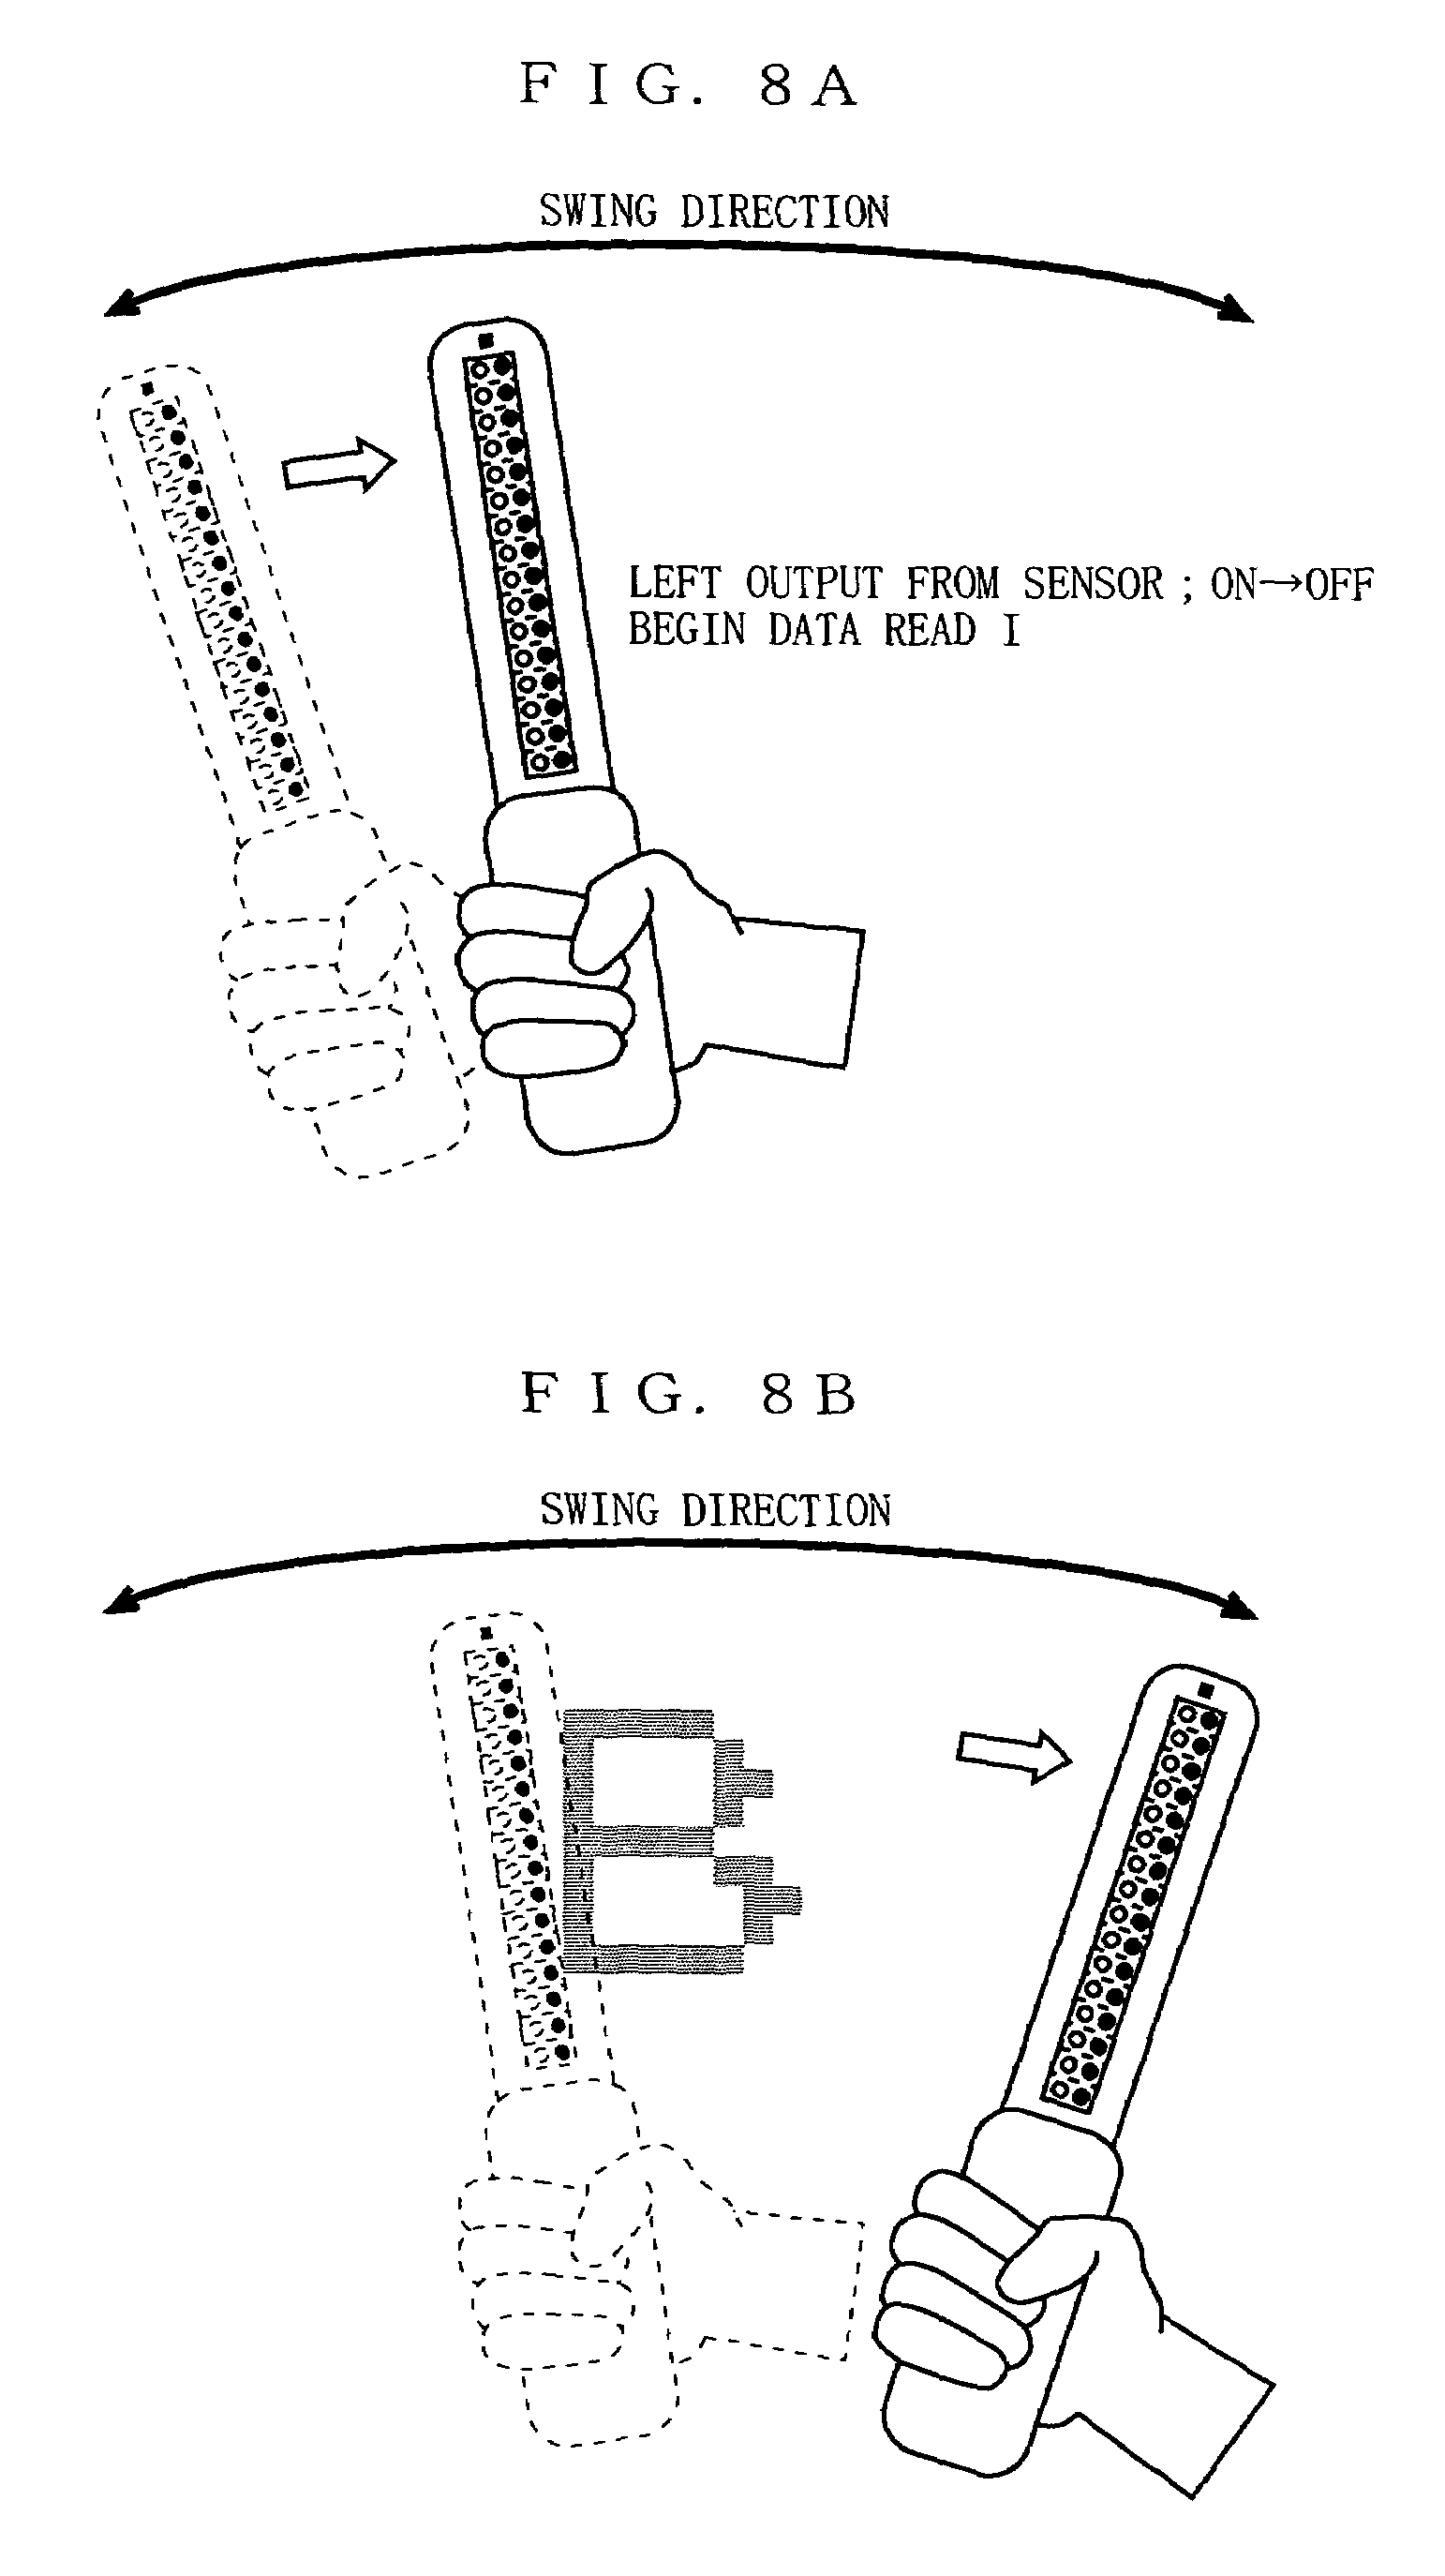
On August 22, 2003, Nintendo Co Ltd filed an application for a patent for a "Swing-type display device" that sounds like the Pokemotion. This patent is very helpful in understanding how the Pokemotion works, and the following images are taken from there.
The Pokemotion has an array of 16x2 LEDs displayed vertically. The left side is a red LED and the right side is a green LED.
The Pokemotion takes advantage of "persistence of vision." This is a psychological phenomenon where an afterimage of an object persists after the rays already hit your eyes. If you place an led on a stick and move the stick back and forth quickly, you'll see that it looks like an arc is being formed, even though light is only being emitted from one point.
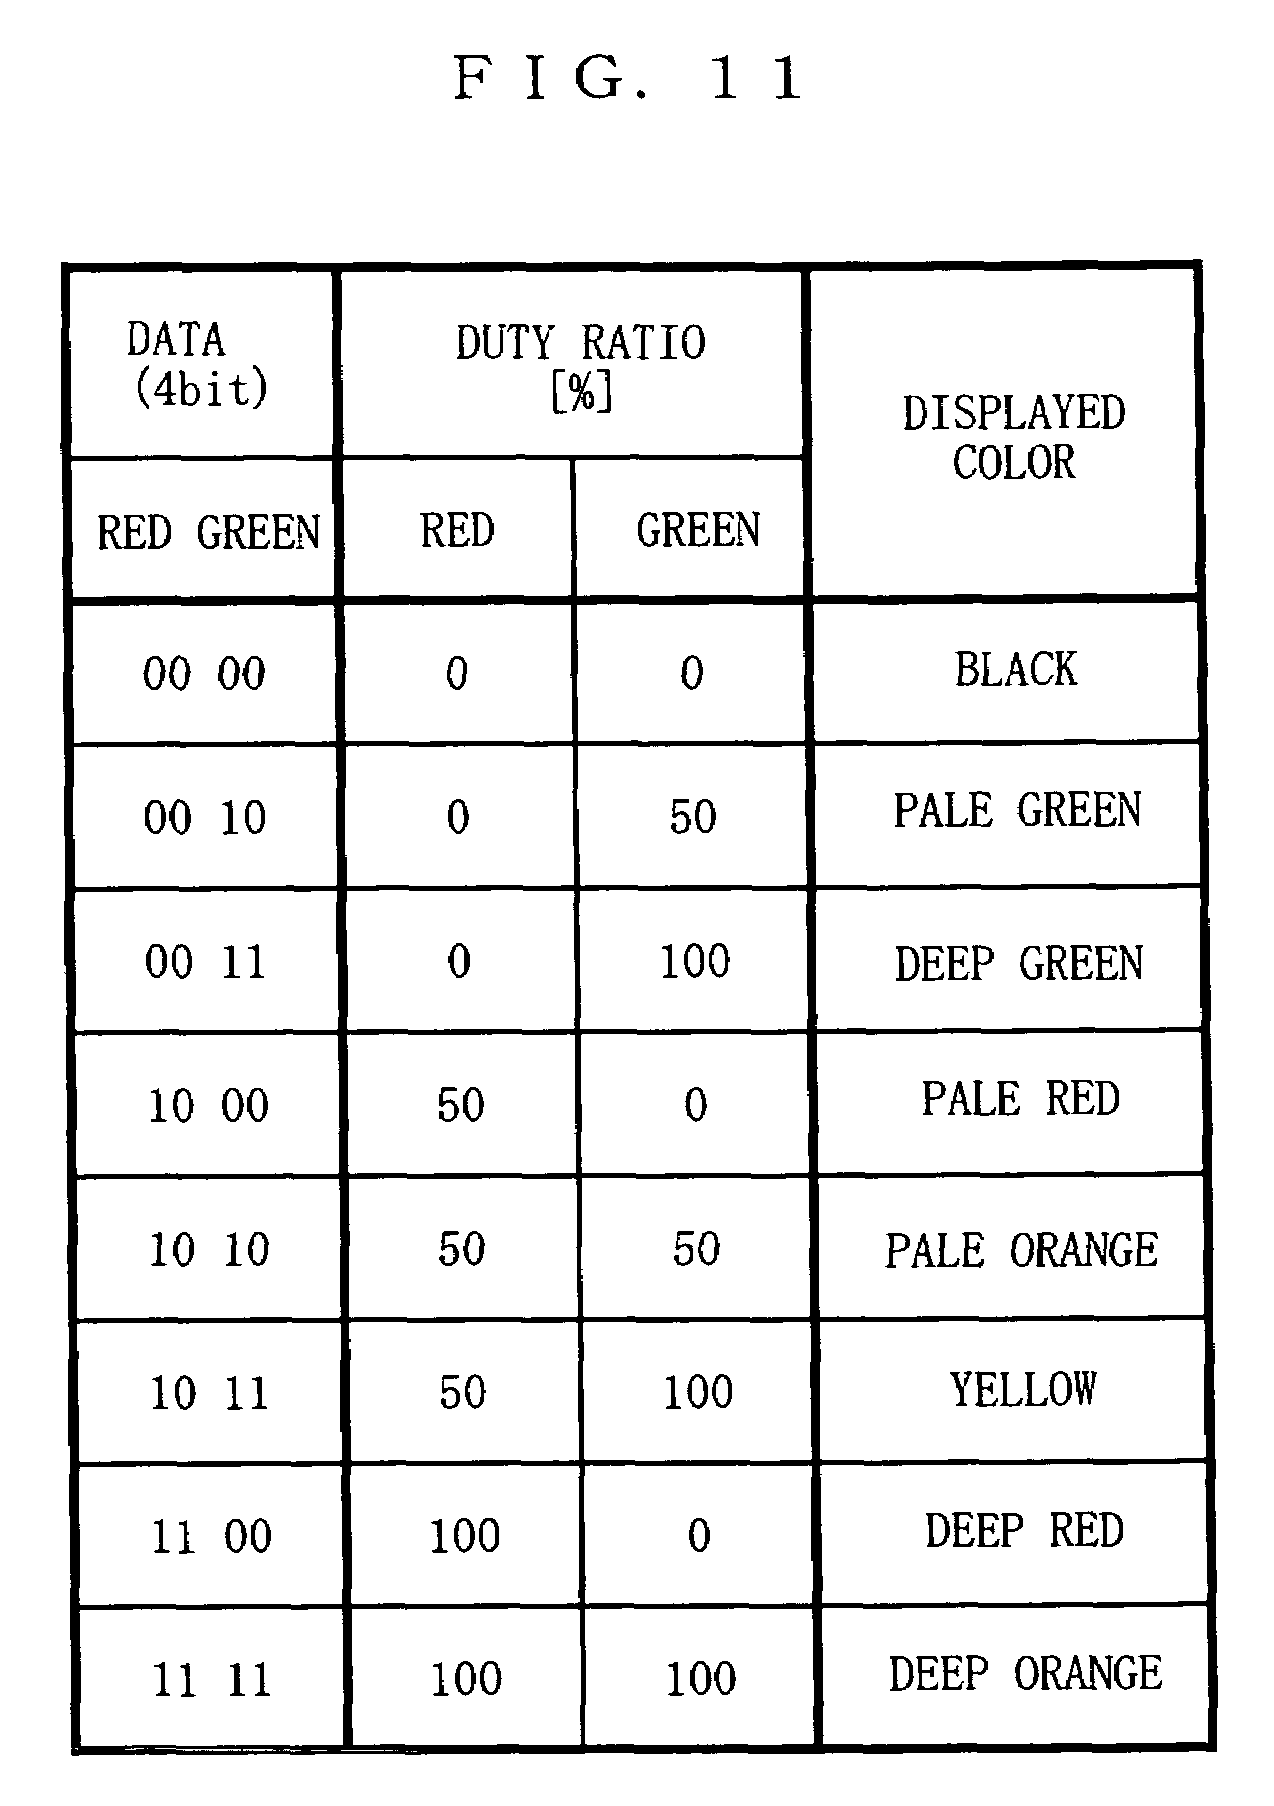
Taking advantage of this optical illusion, the Pokemotion rapidly changes which LEDs are lit to produce a more complex image. Additionally, by changing the brightness of the red and green LEDs, it can produce the appearance of colors like yellow and orange.
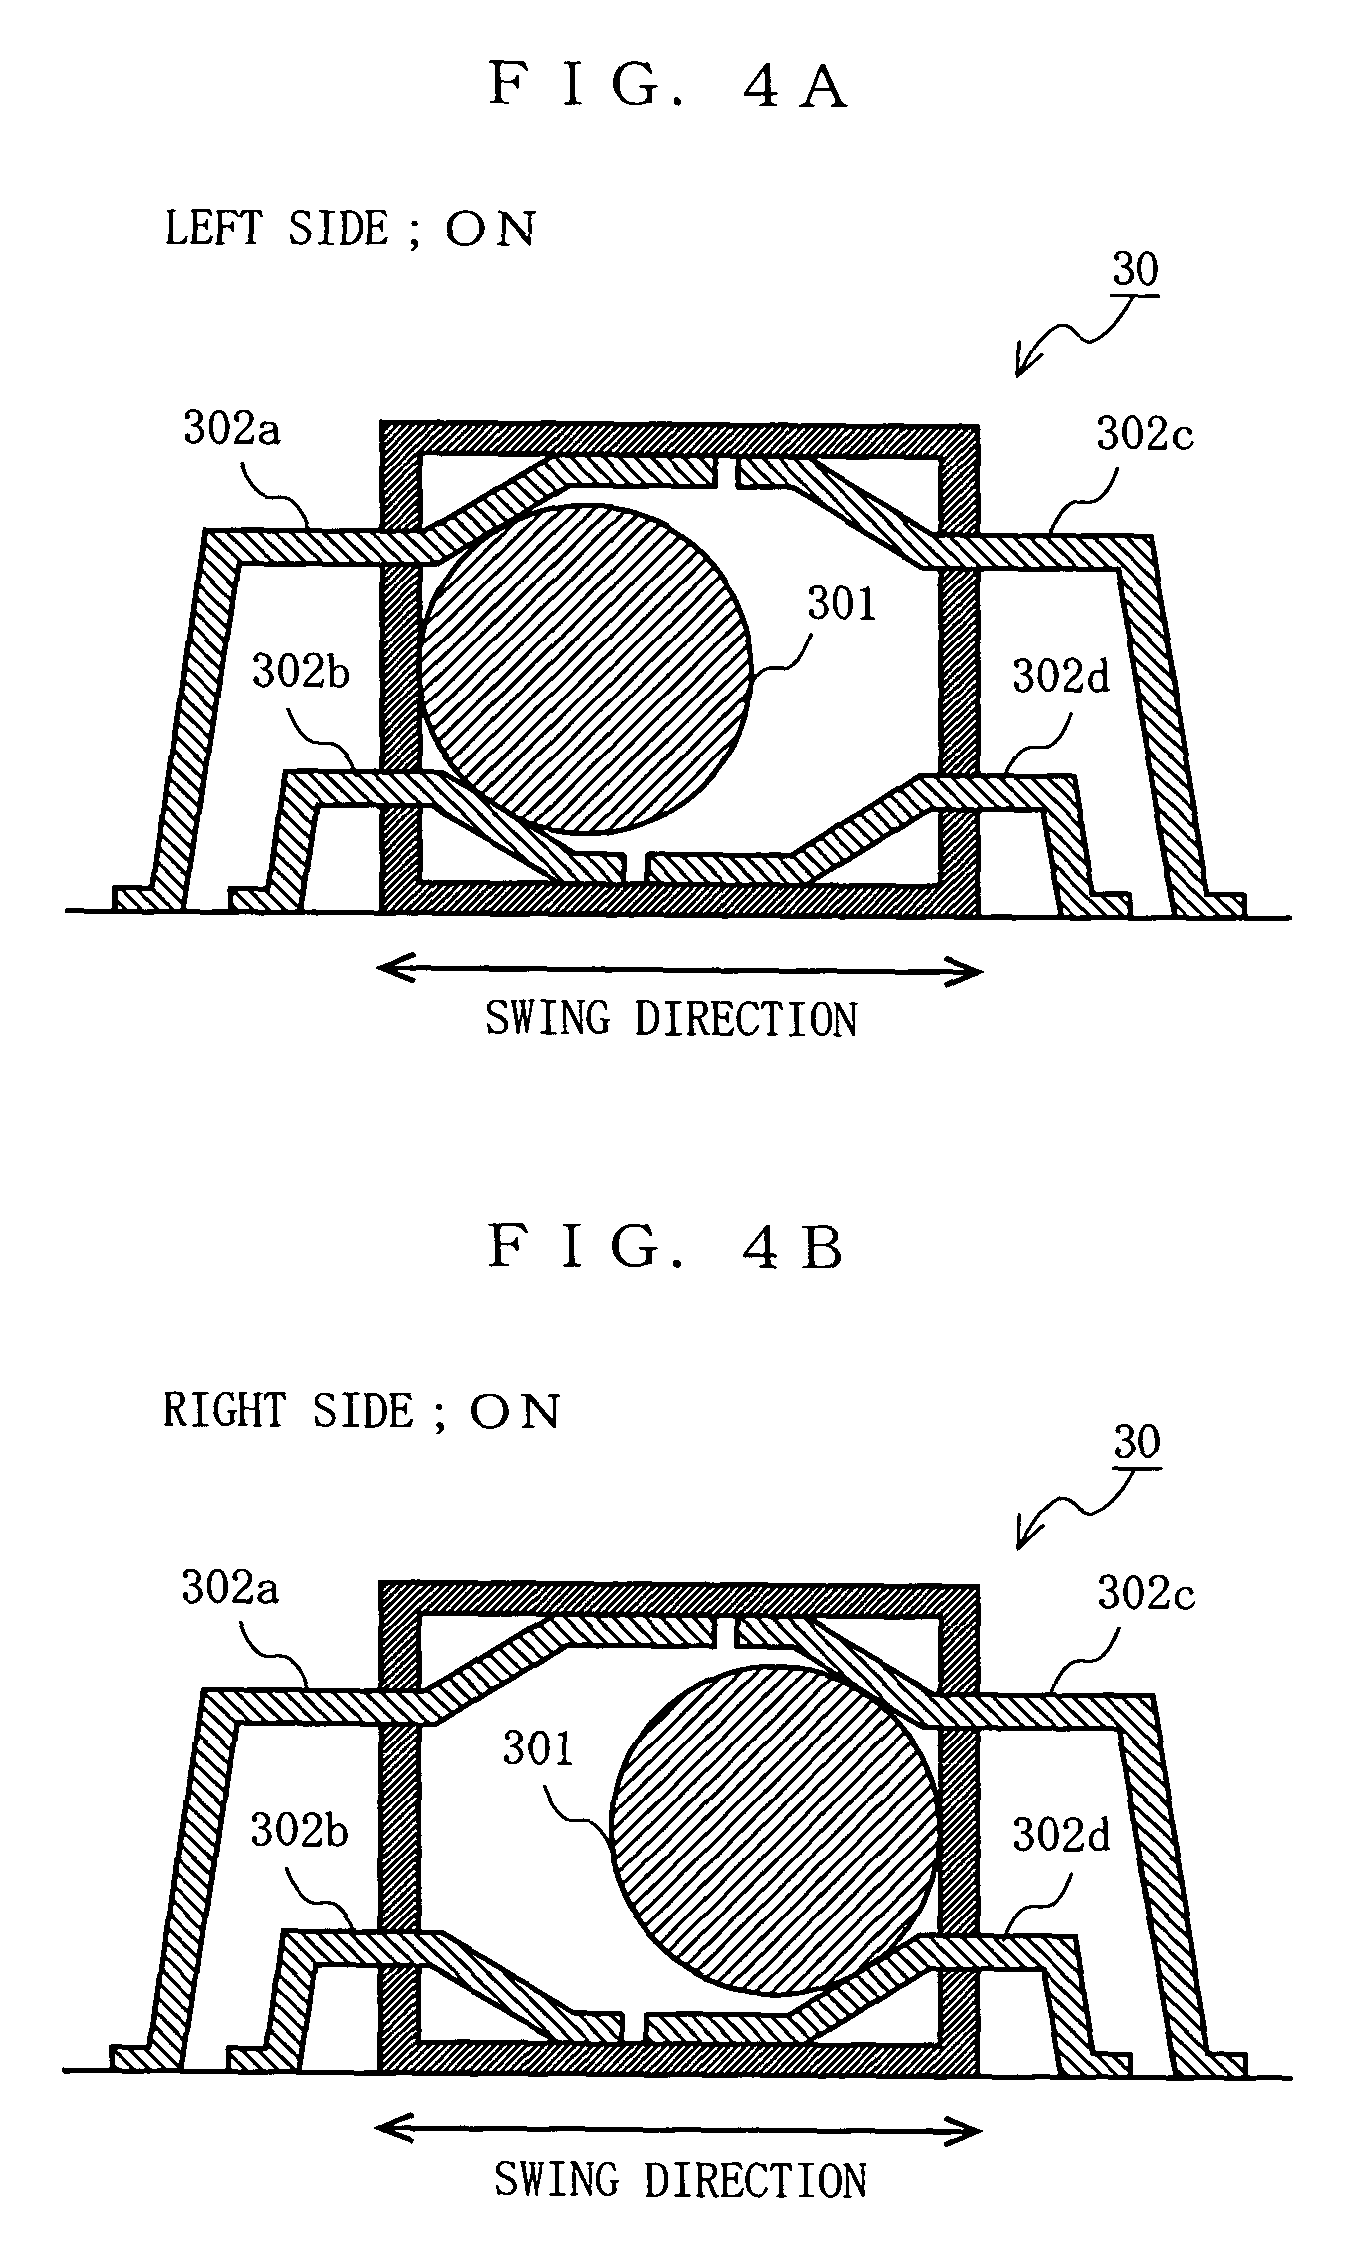
To keep the image persistent when you wave it back and forth, there is a sensor inside the device that knows what direction you are waving the device in. When the ball inside a container hits the other side, it signals that you have changed direction. The device then actually generates the image backward so it looks the same when you are coming from the opposite direction.
Teardown
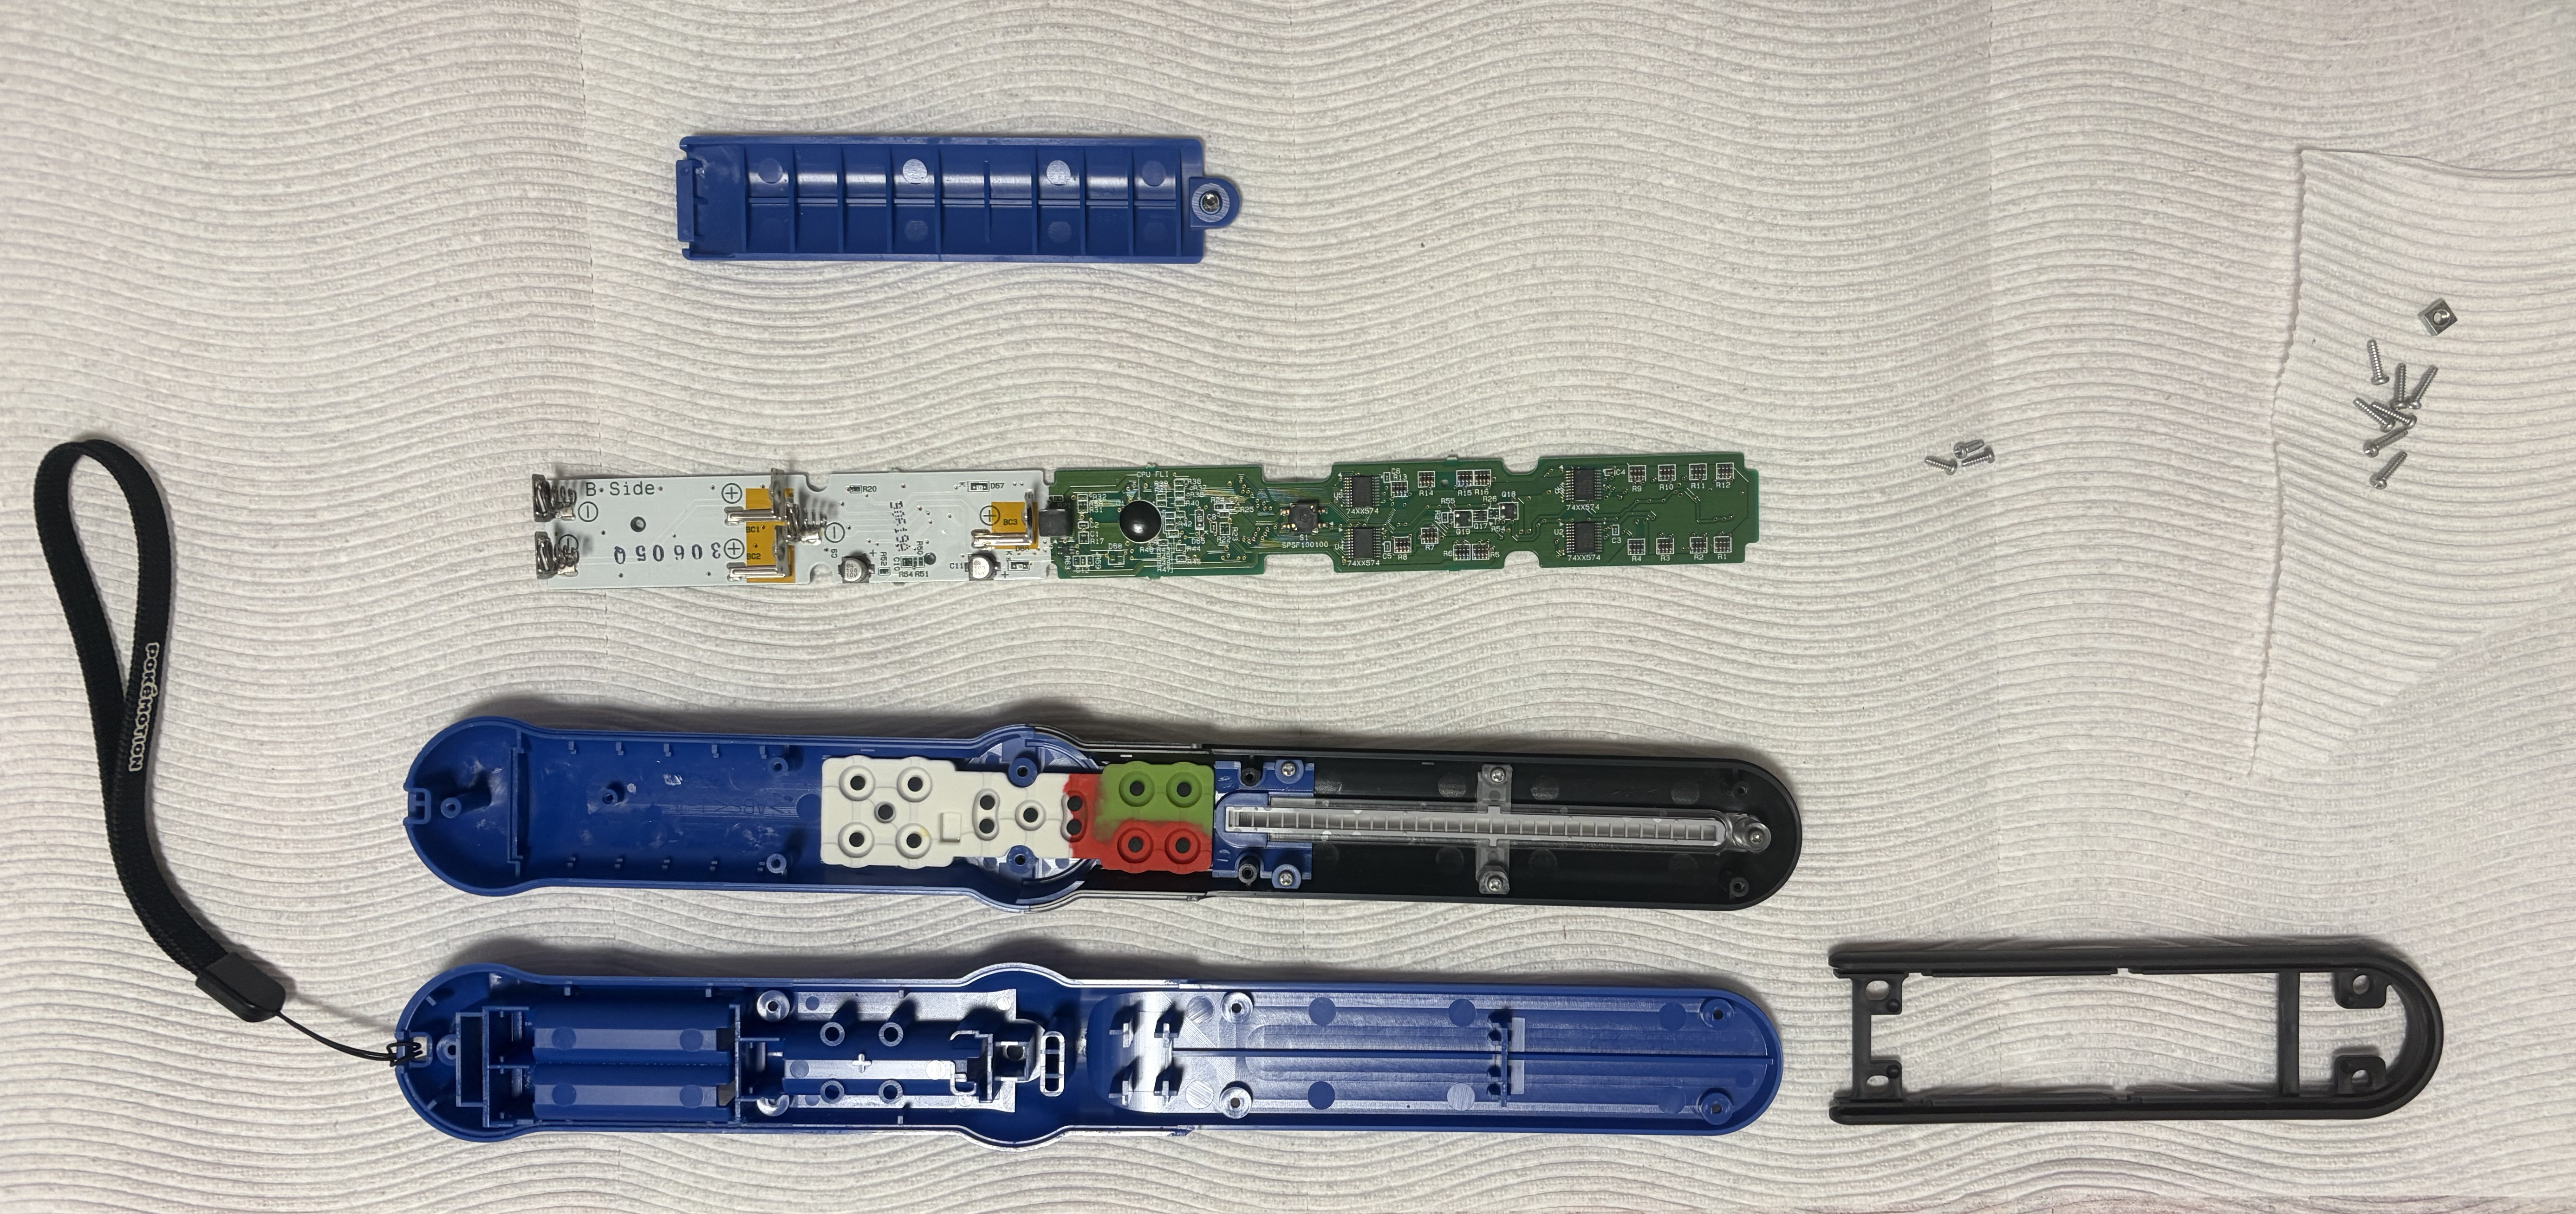
When disassembled, we can see the two halves of the blue plastic shell, the back to the batter compartment (with a captive screw), a black trim, the PCB, and the buttons (removable; shown inserted because putting them back in was a challenge).
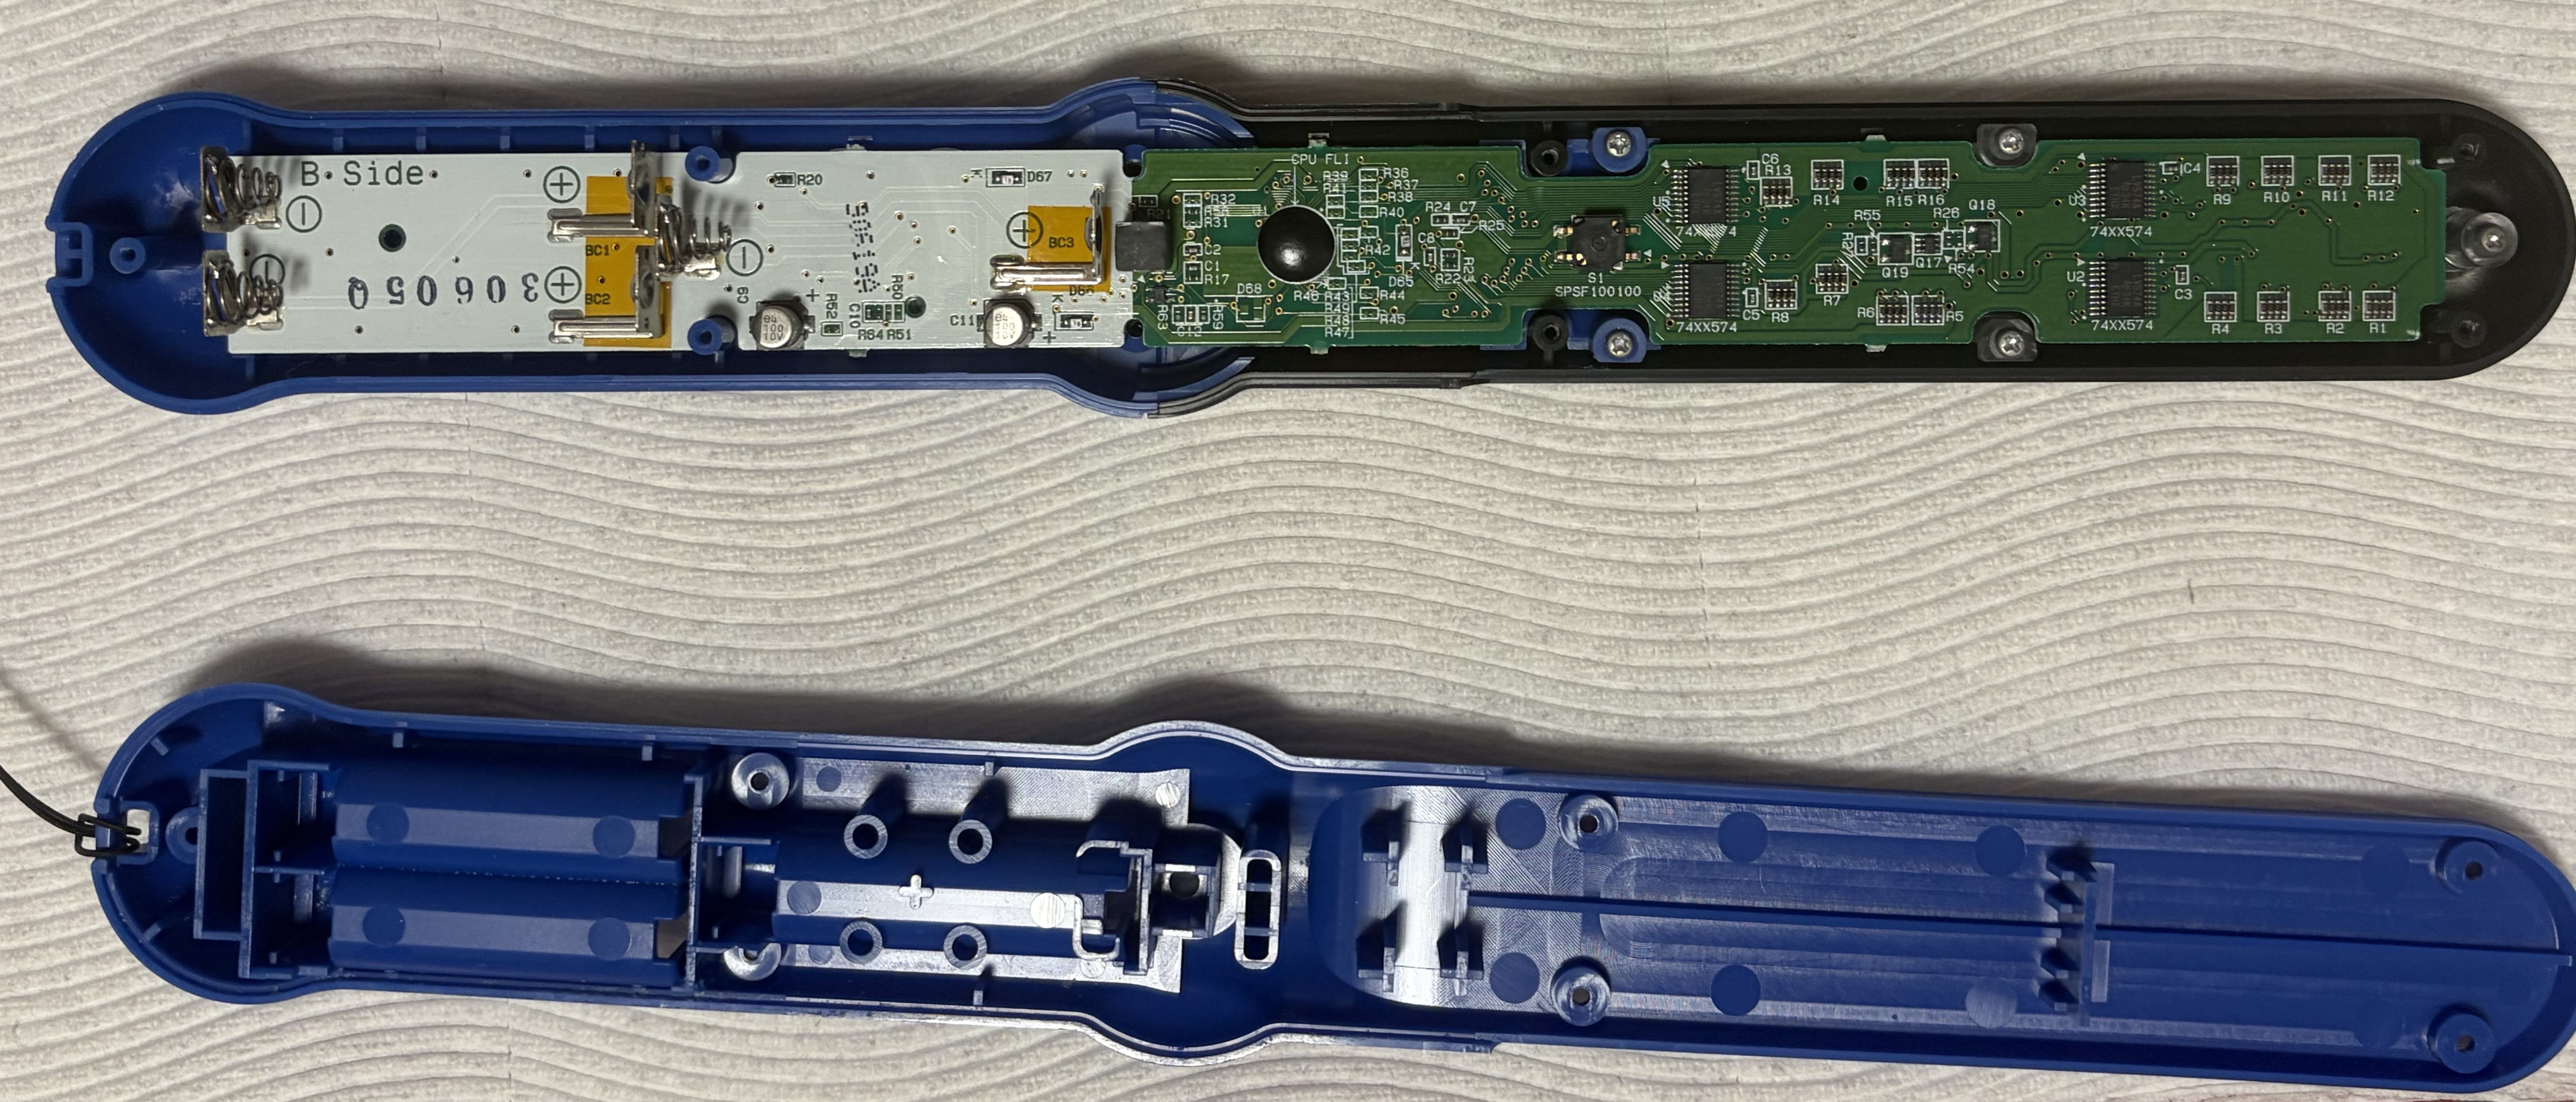
The board in the toy. The "B-side", which has the battery terminals, faces the back of the toy.
A-side
This side has the LEDs which are responsible for making the images.
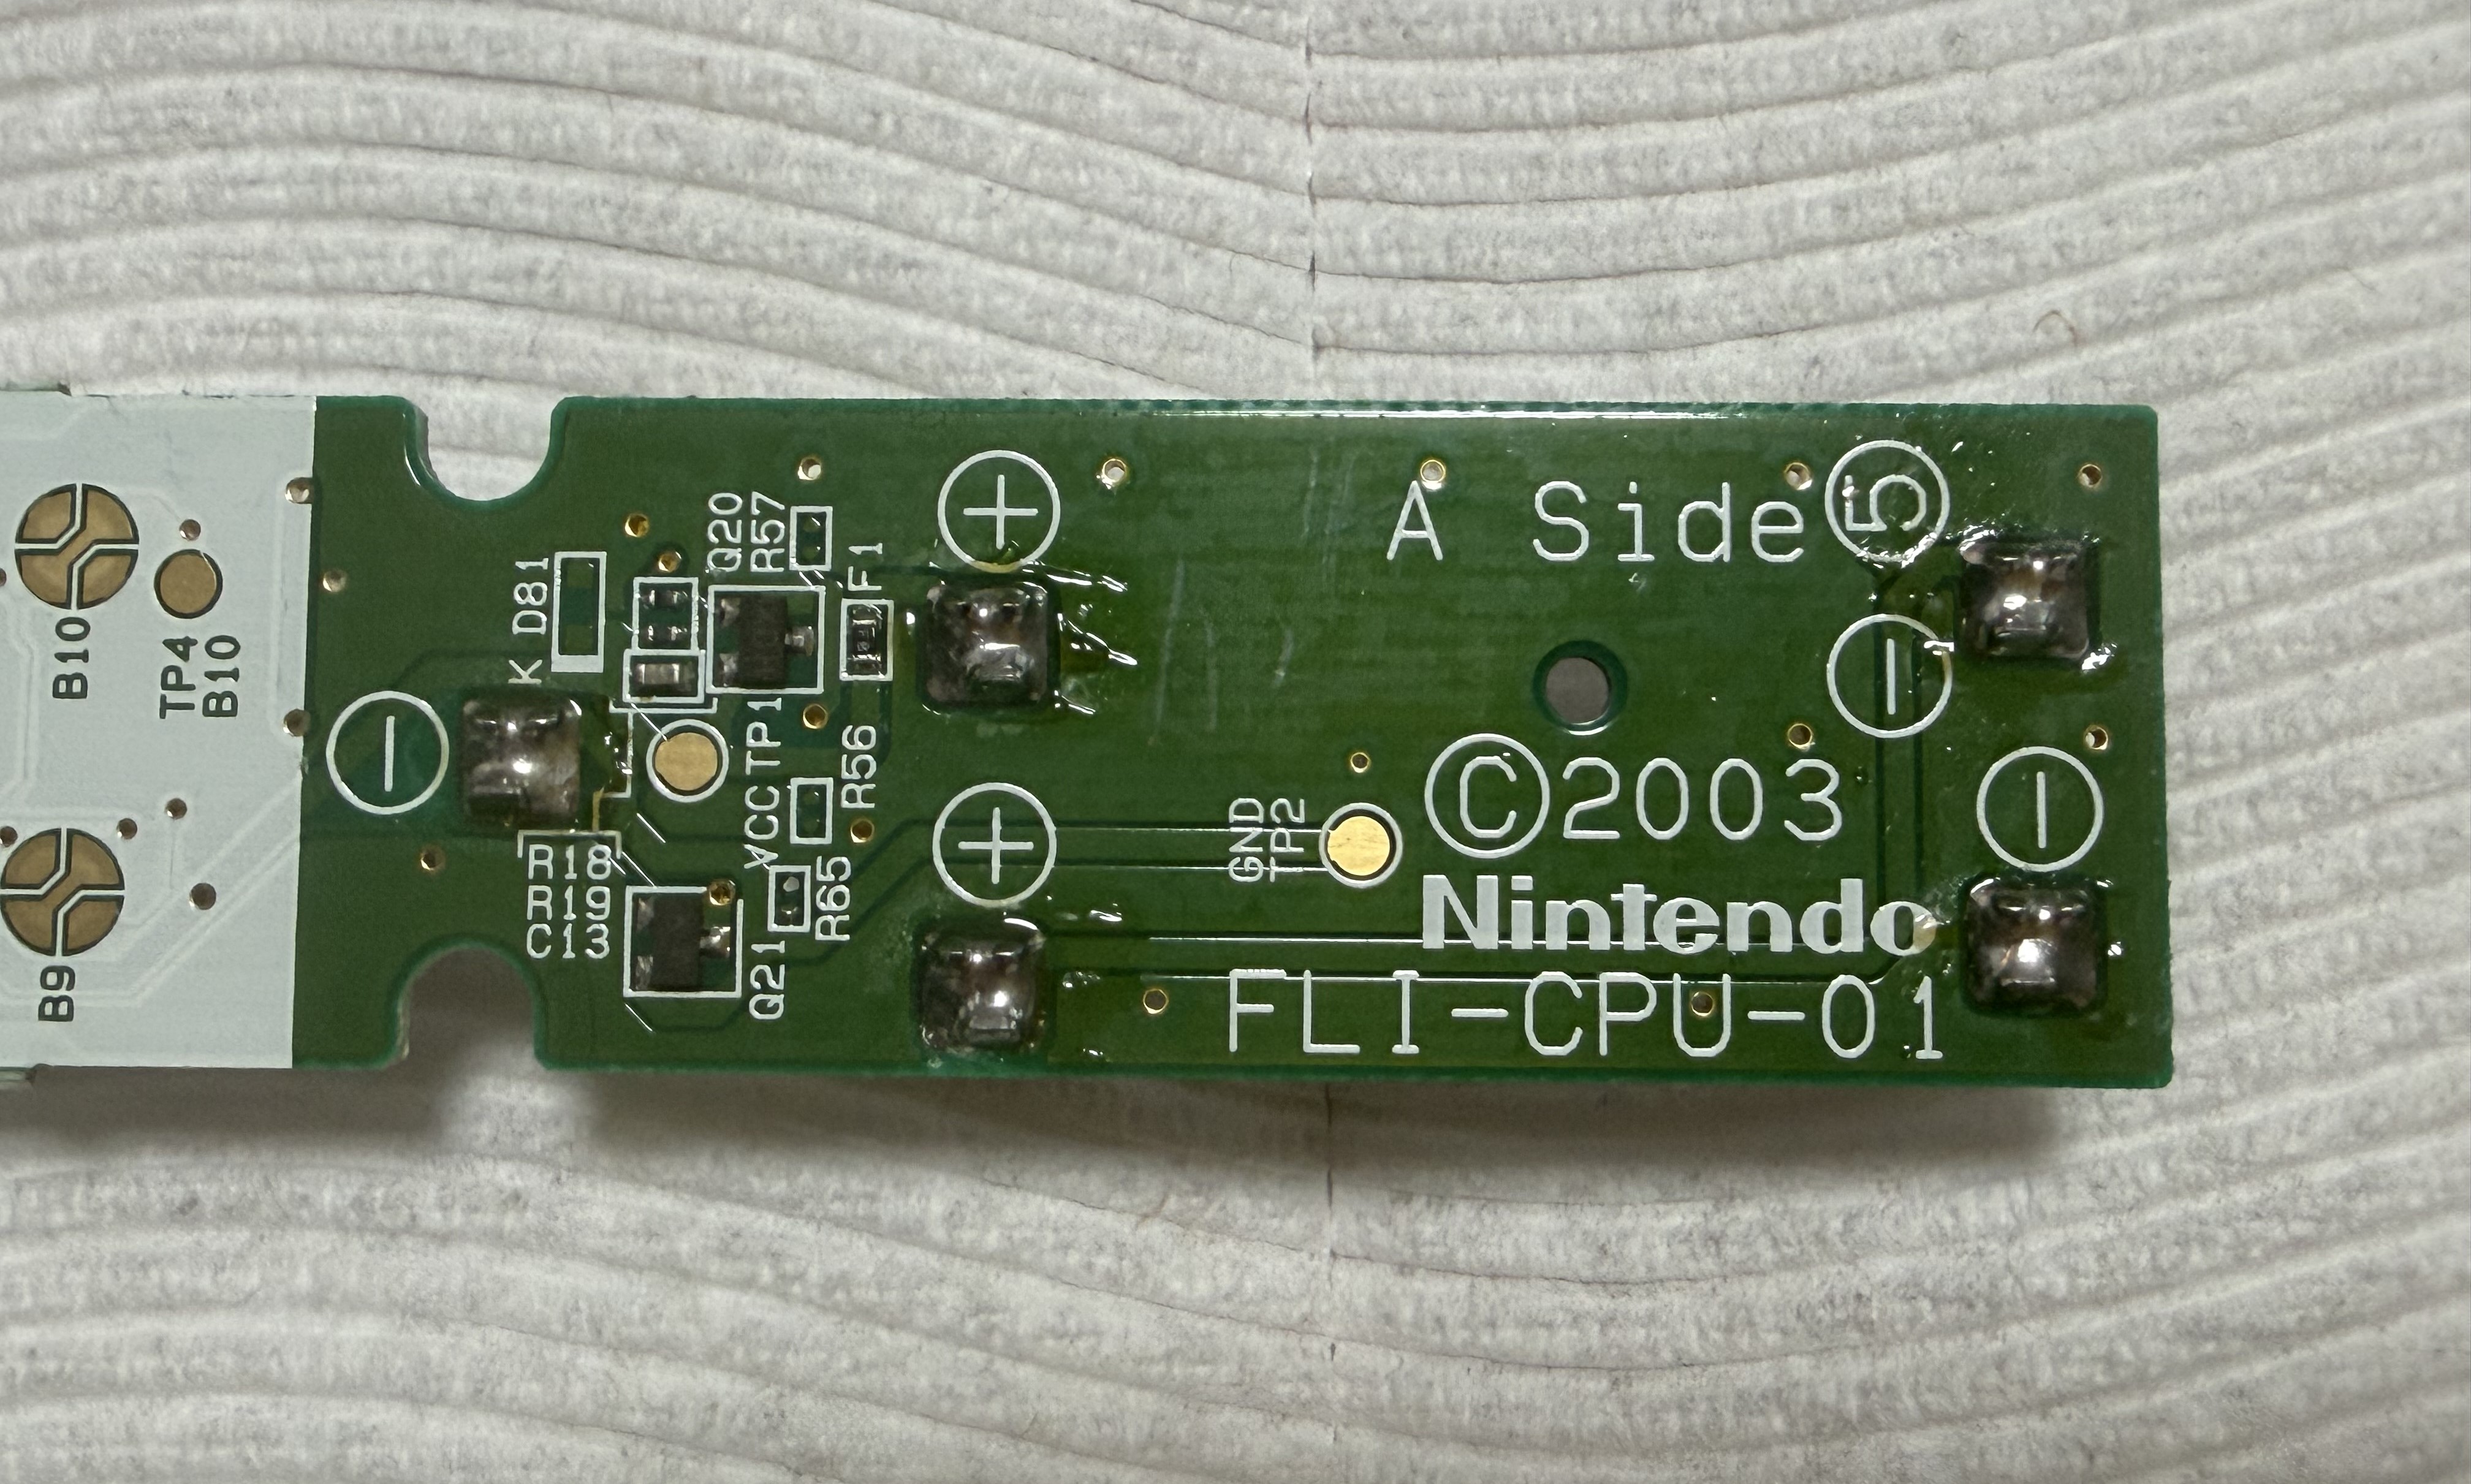
The flipside of the battery terminals. You can also see the Nintendo logo, a copyright date of 2003, and a board identifier "FLI-CPU-01."
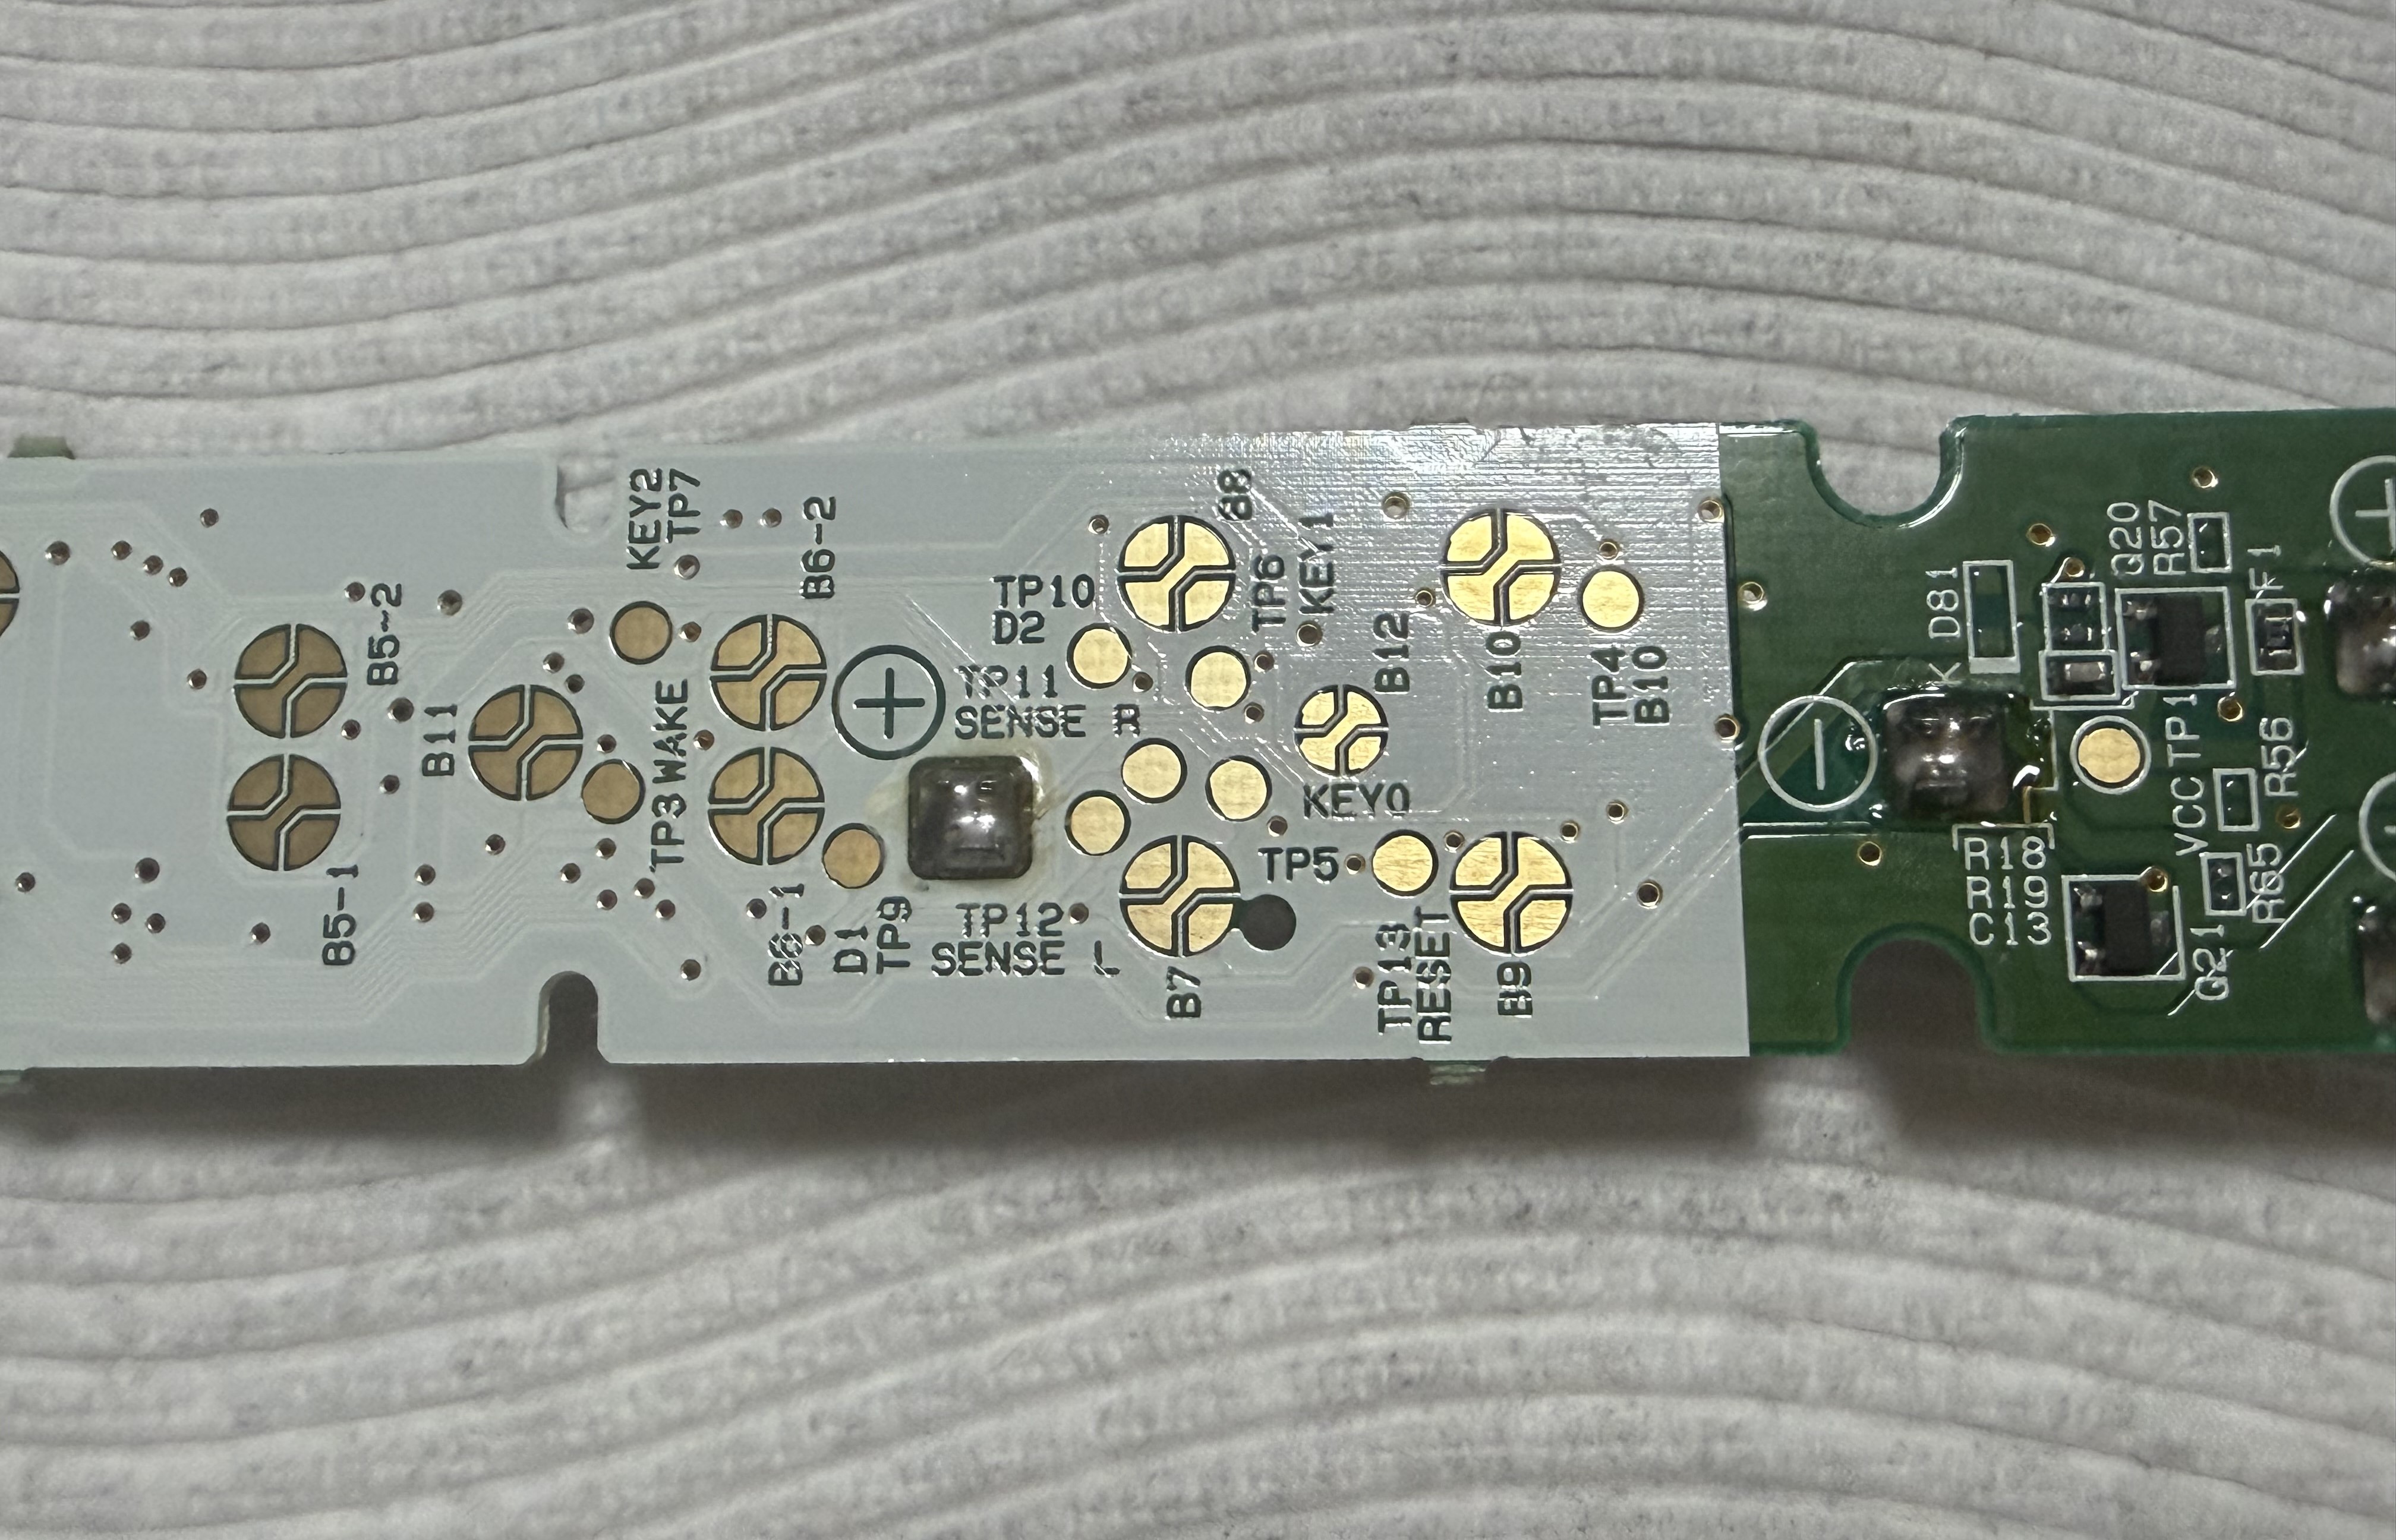
You can see the button switch contacts here, labeled with a B.
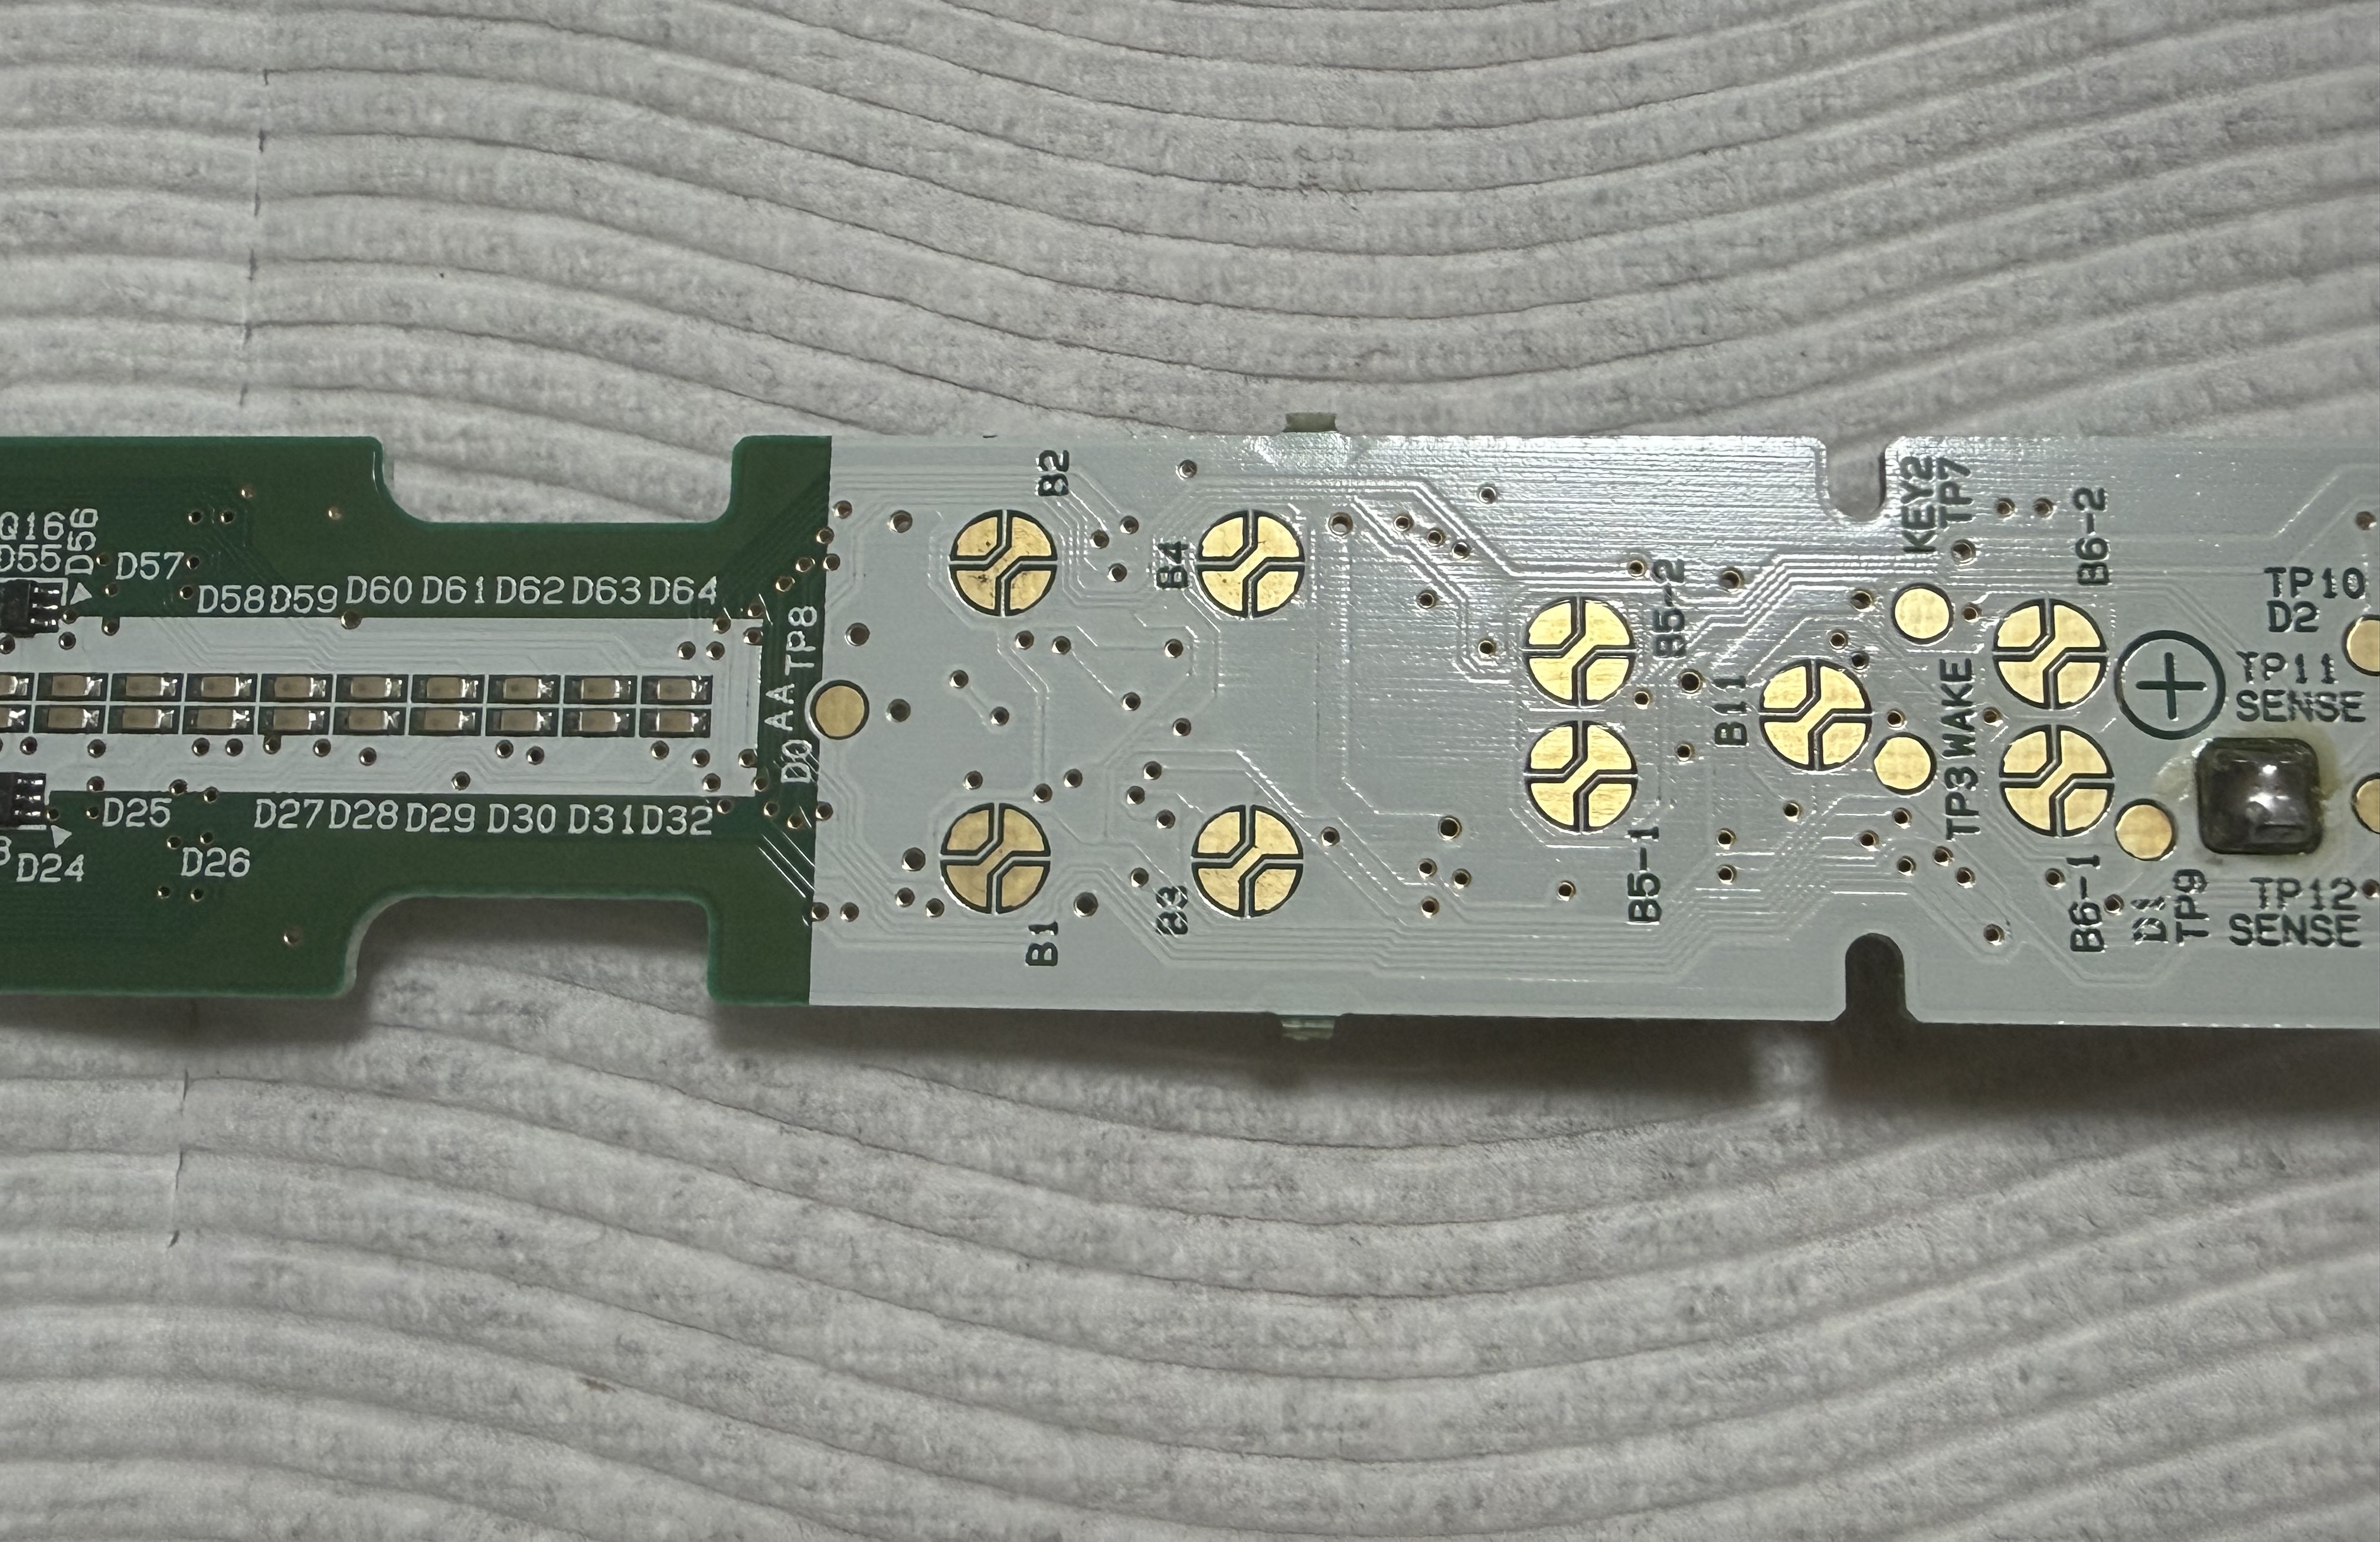
More button contacts.
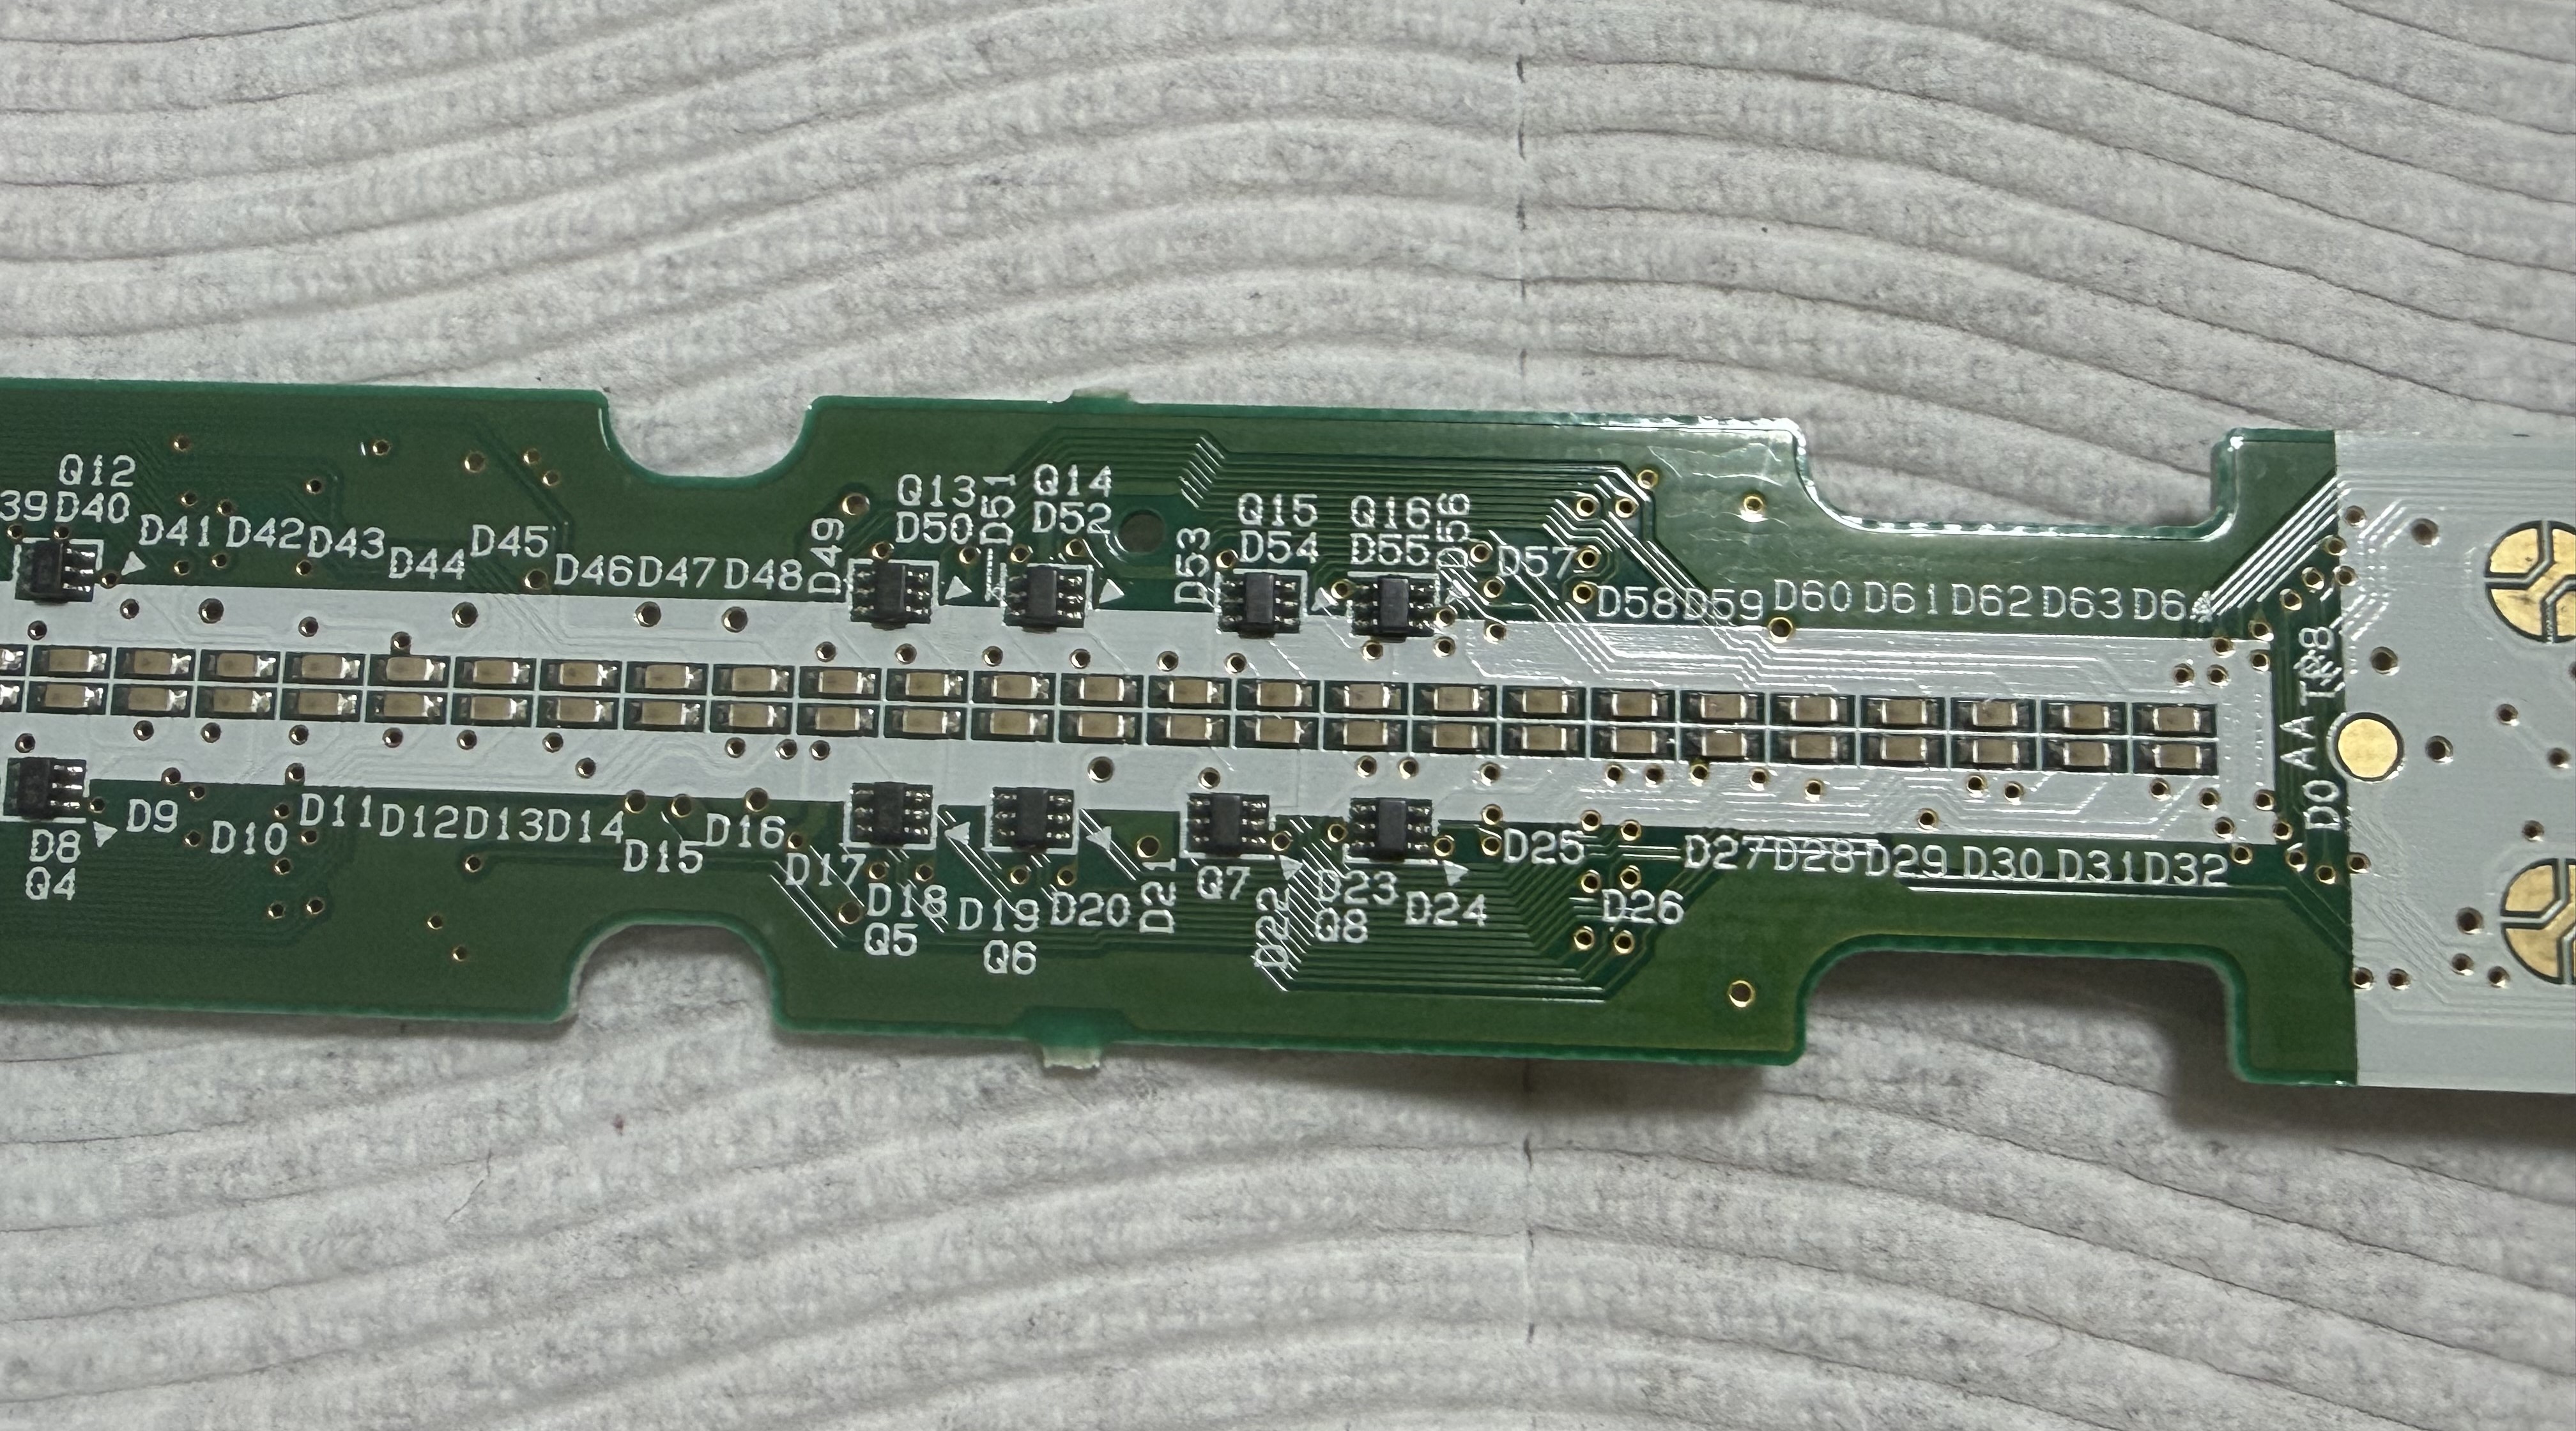
You can see the LEDs clearly here, along with what appear to be some black components labeled "Q", which means these are transistors.
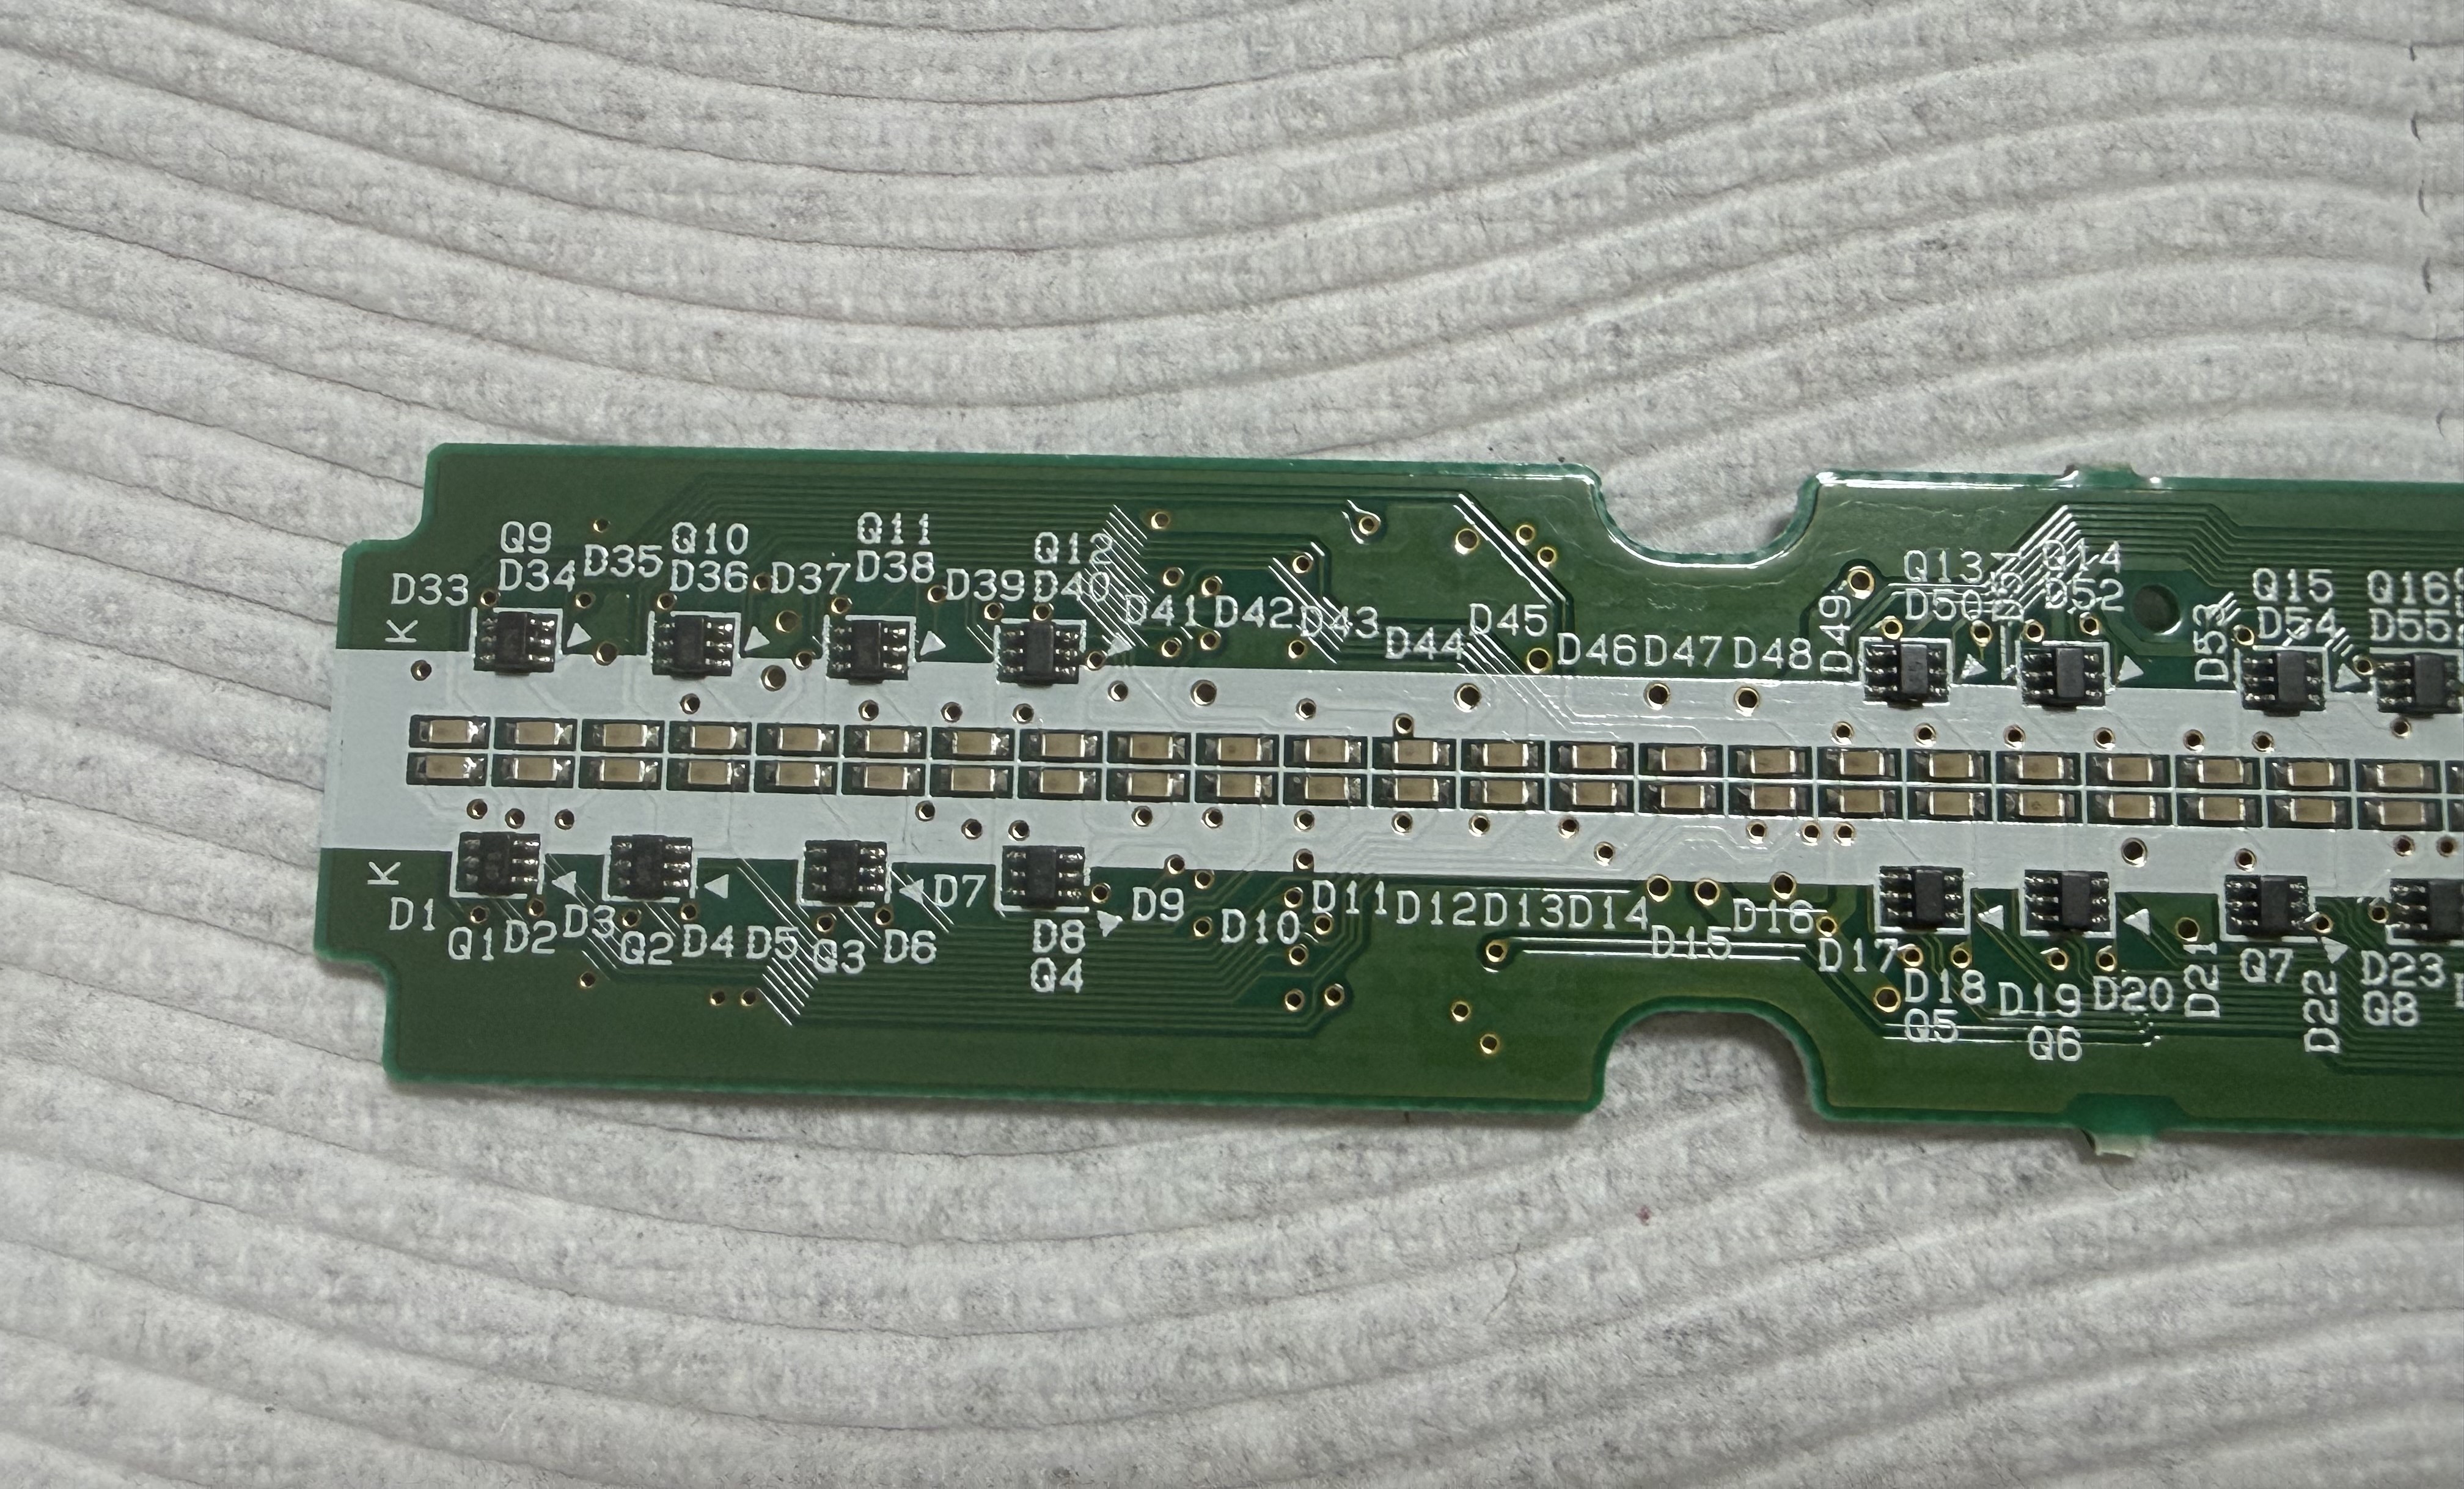
B-side
This side has the battery terminals and the CPU.
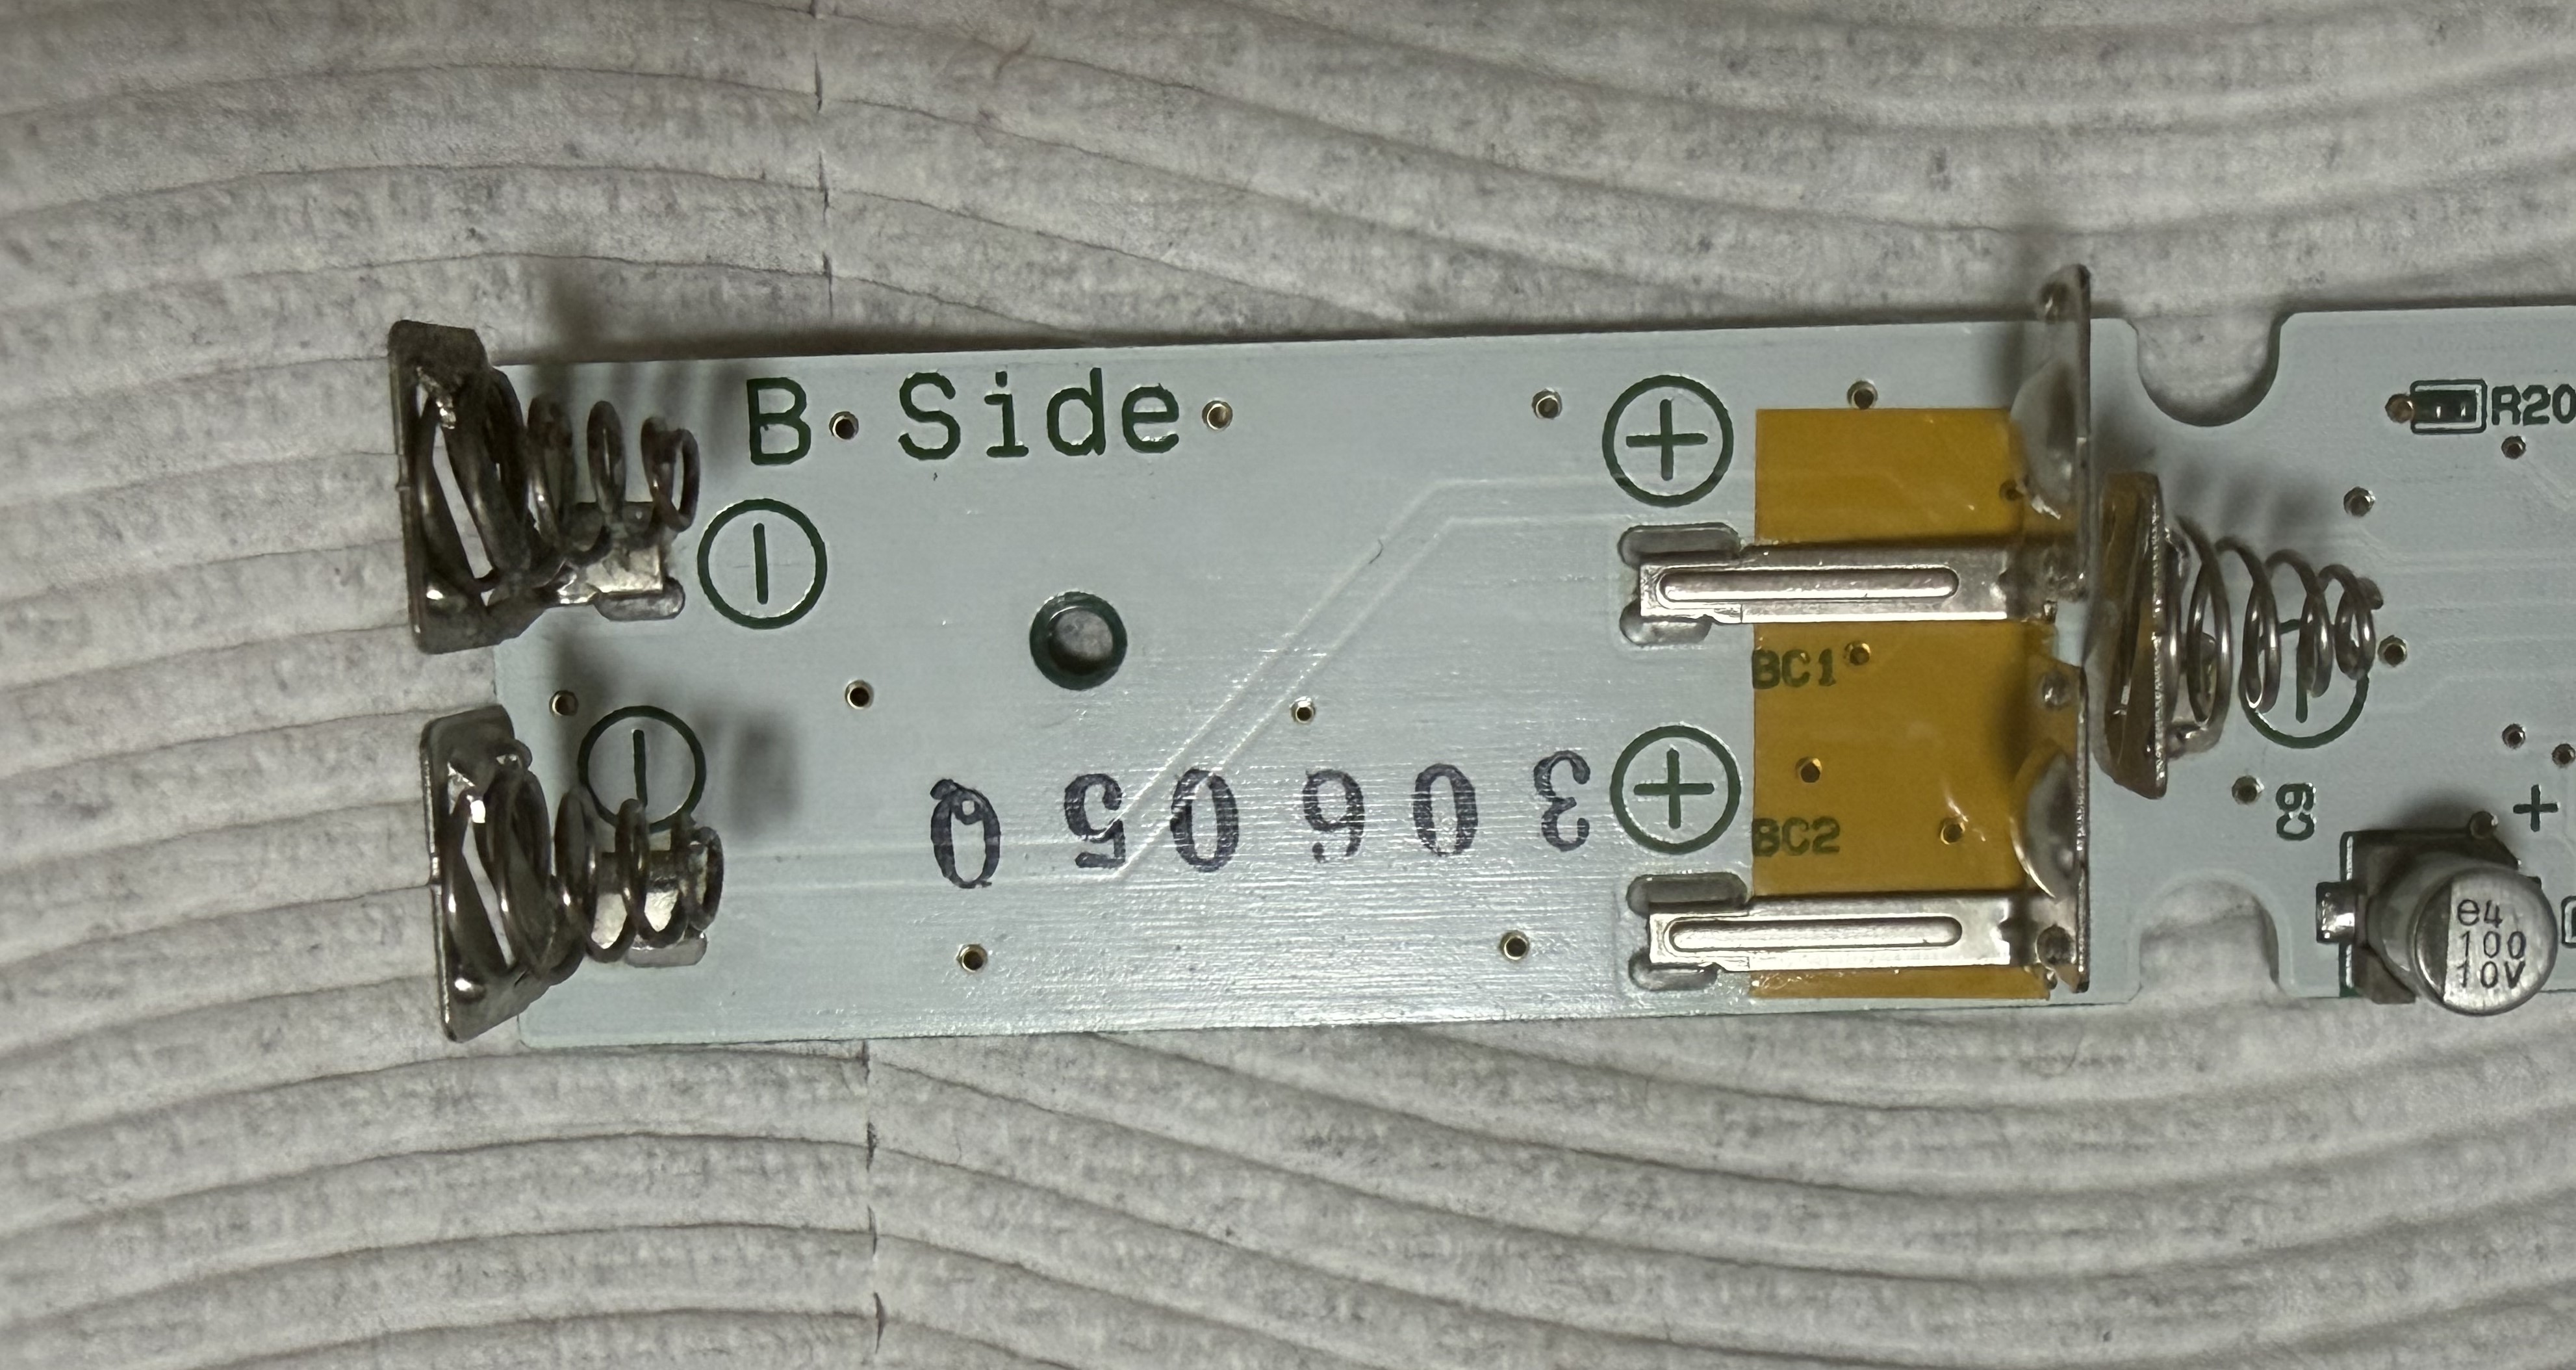
The terminals, along with a mysterious marking "30605Q."
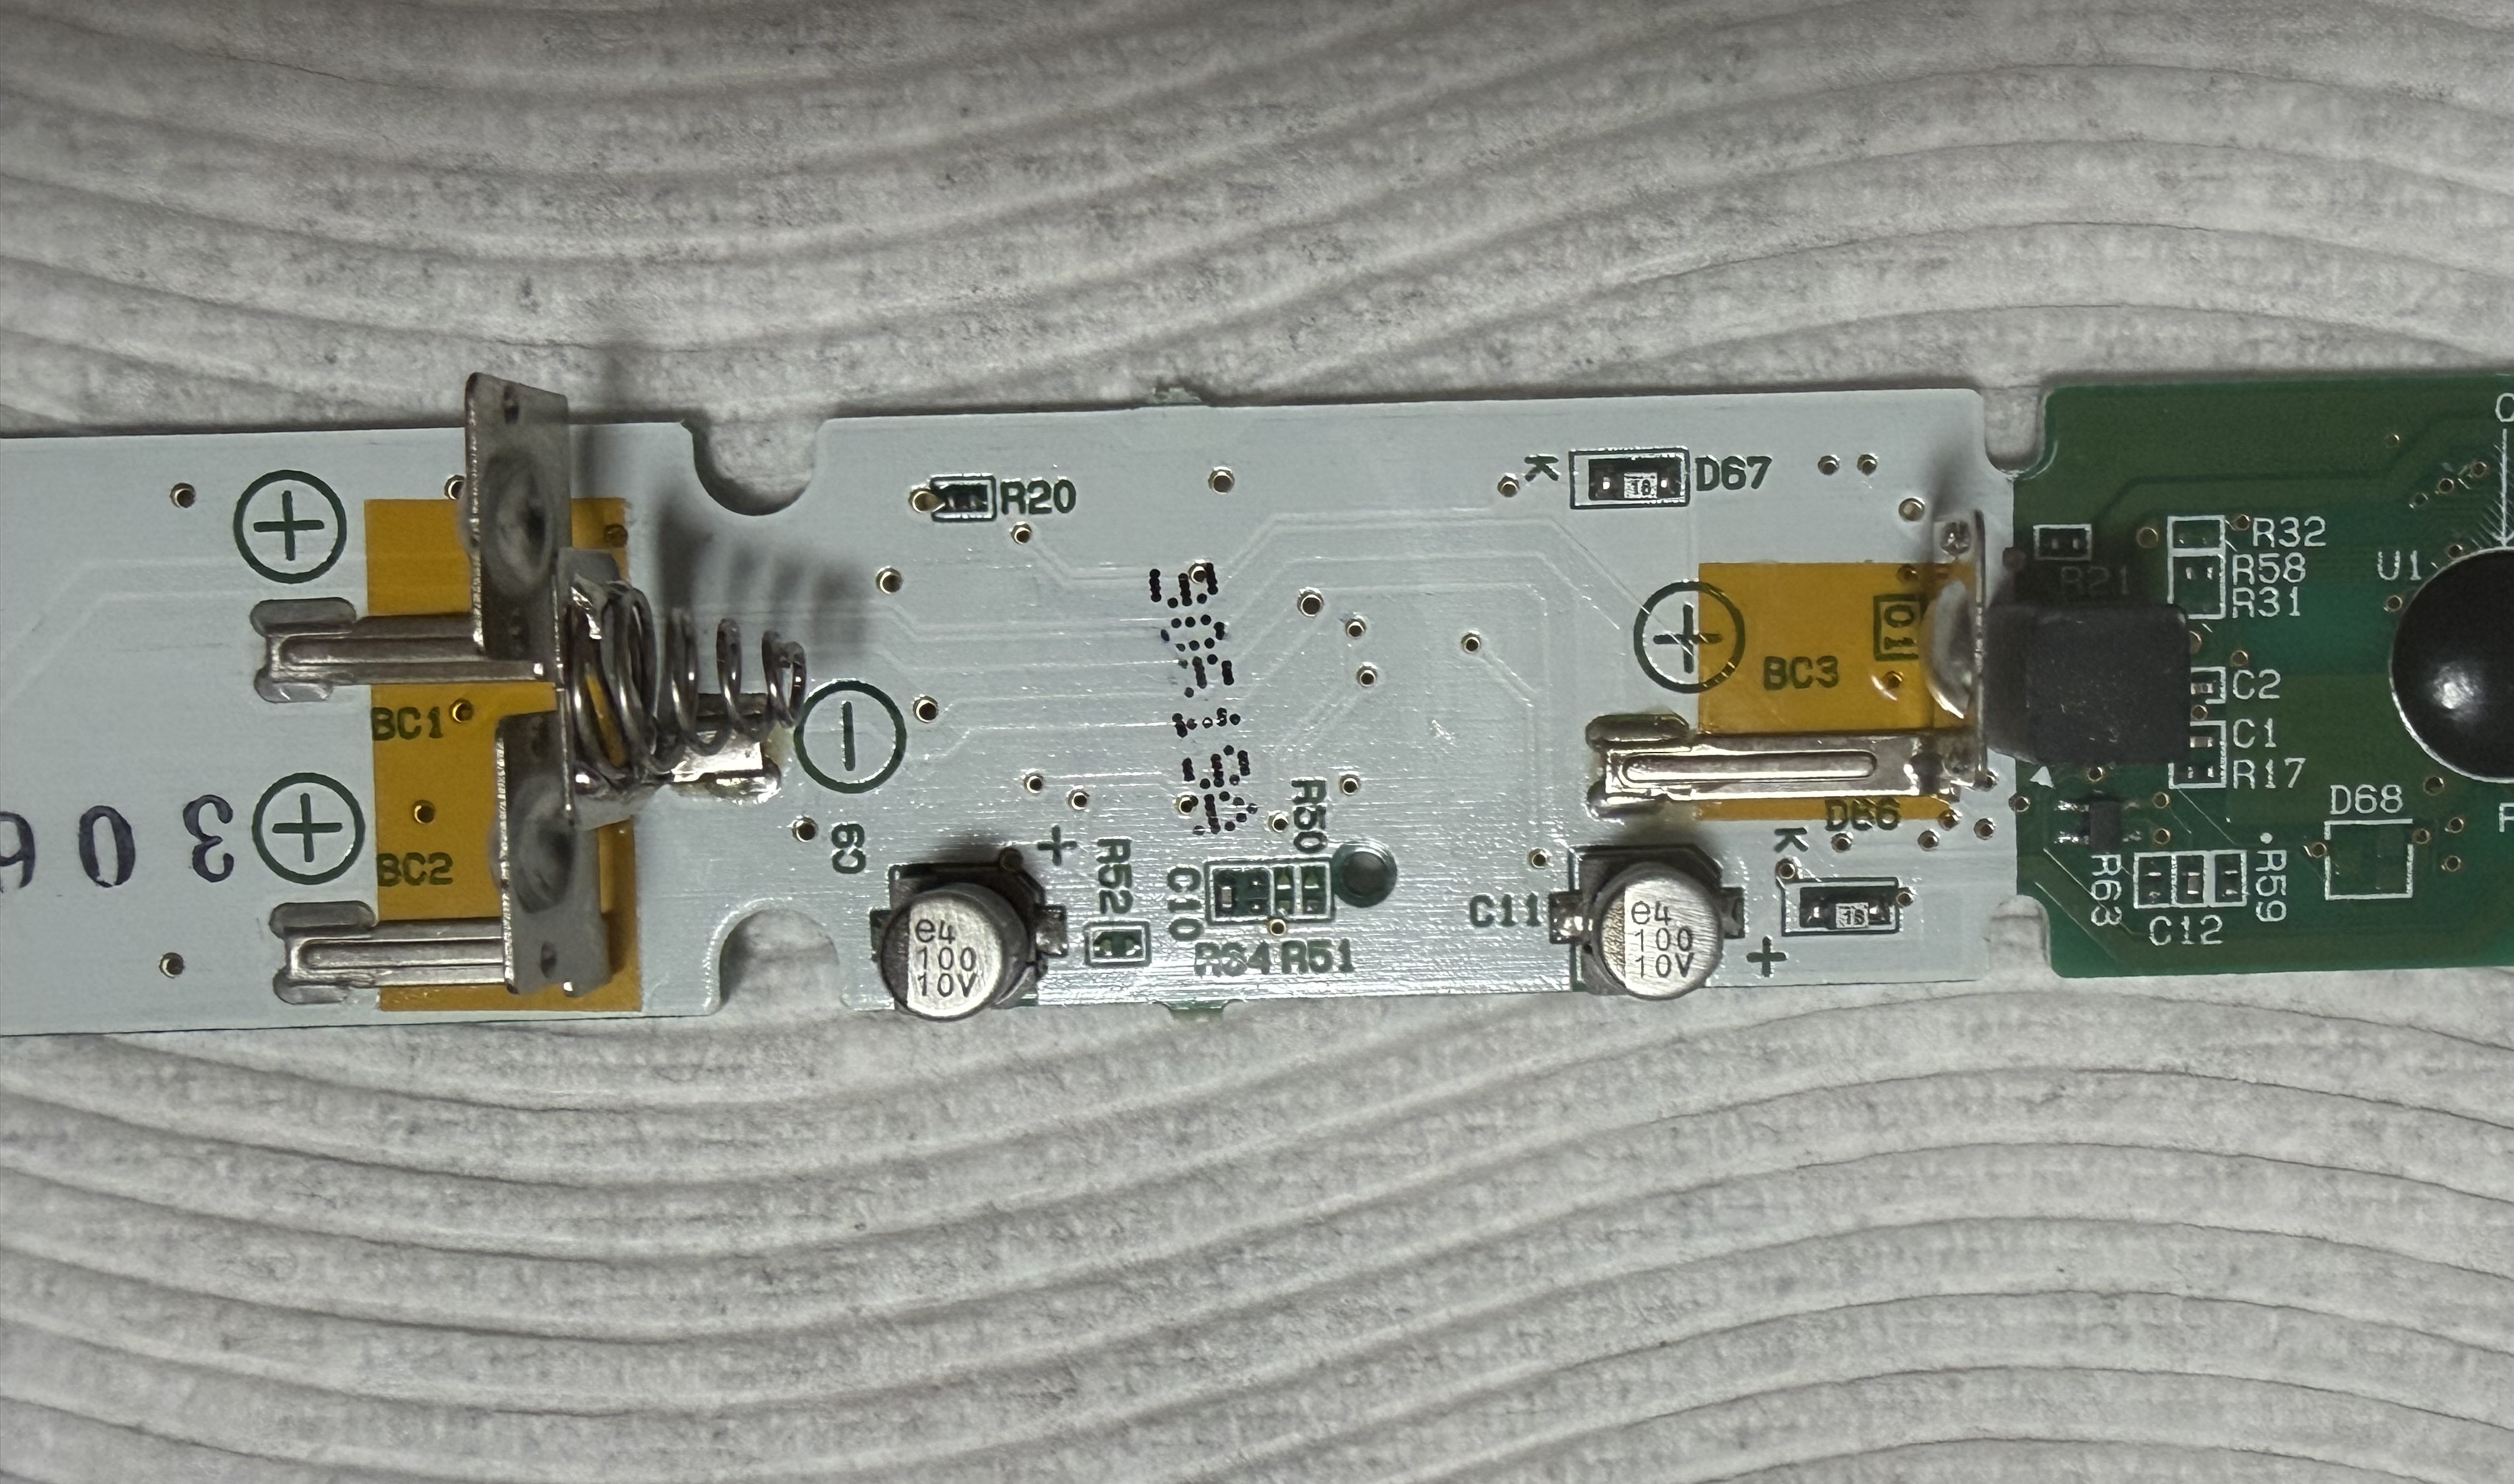
You can see two silver capacitors marked "e4 100 100v."
The black square near the terminal on the right is a rubber spacer that actually fell out of the plastic.
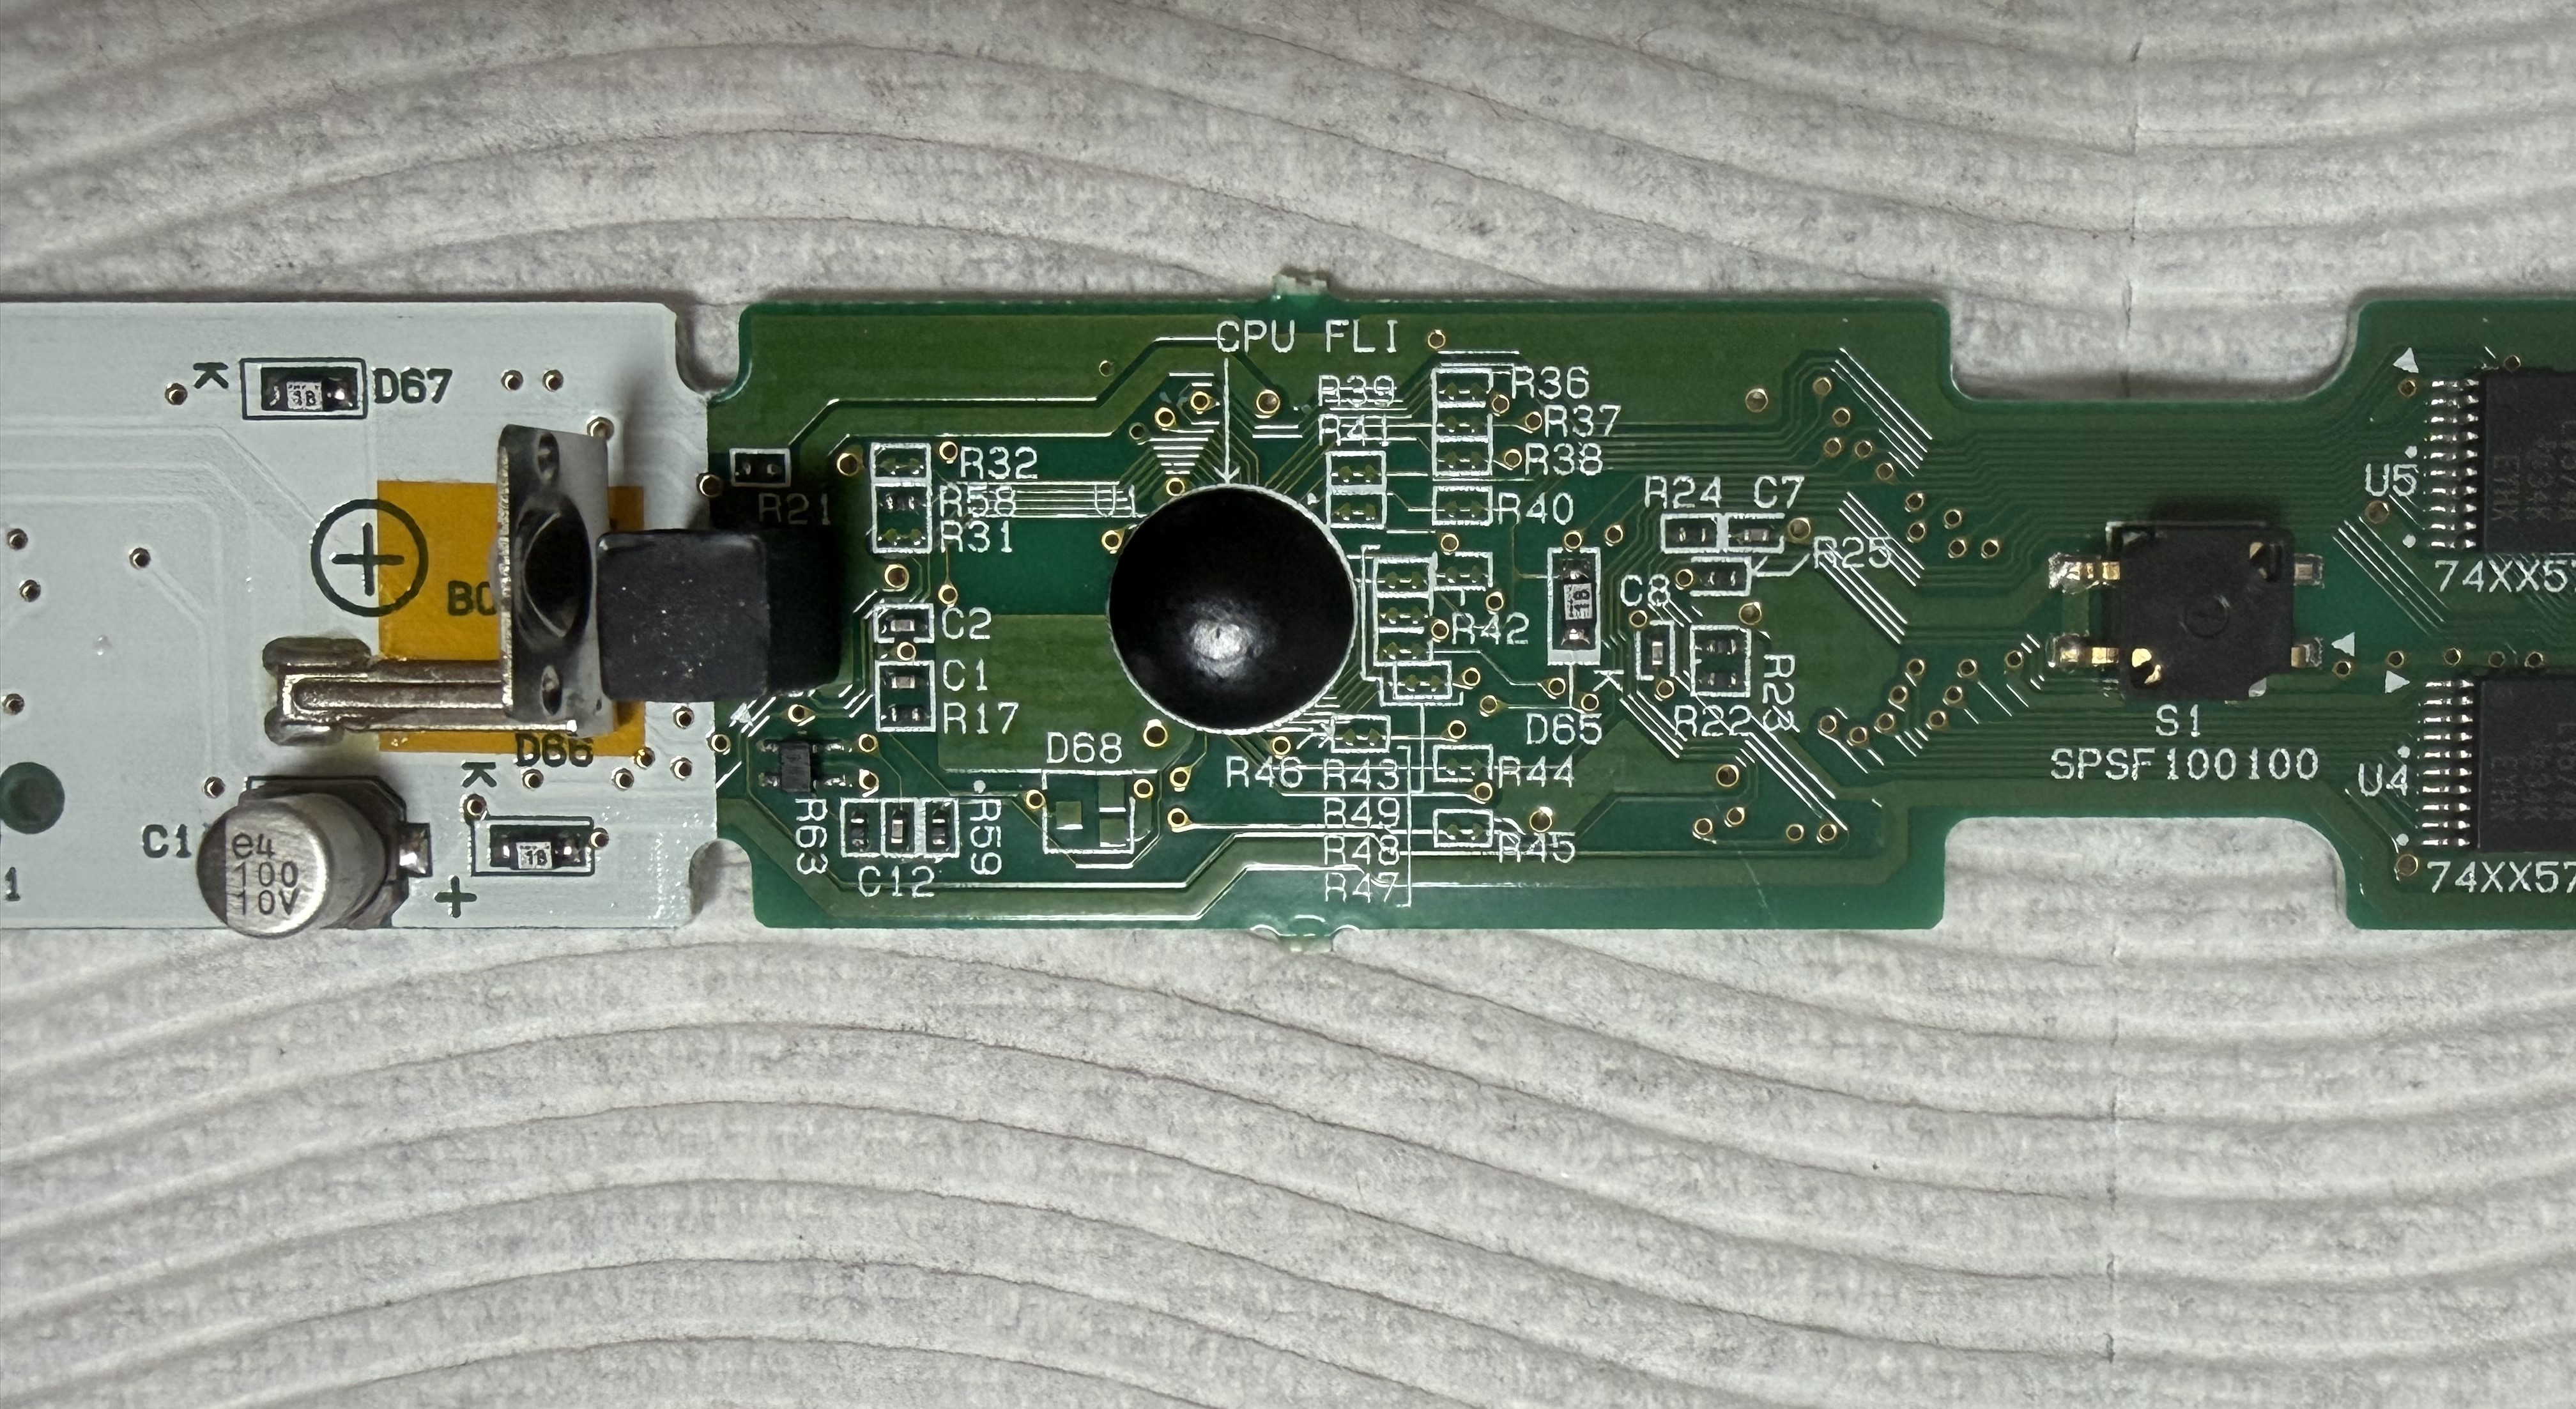
You can see the CPU very clearly here, with an arrow pointing to it labeled "CPU FLI." This arrangement is called a "Chip-on-Board" assembly, where the black epoxy protects the microchip die which is directly on the board. This is a cheap assembly option, which is excellent for a mass produced toy. Unfortunately, it also makes dumping the ROM extremely risky.
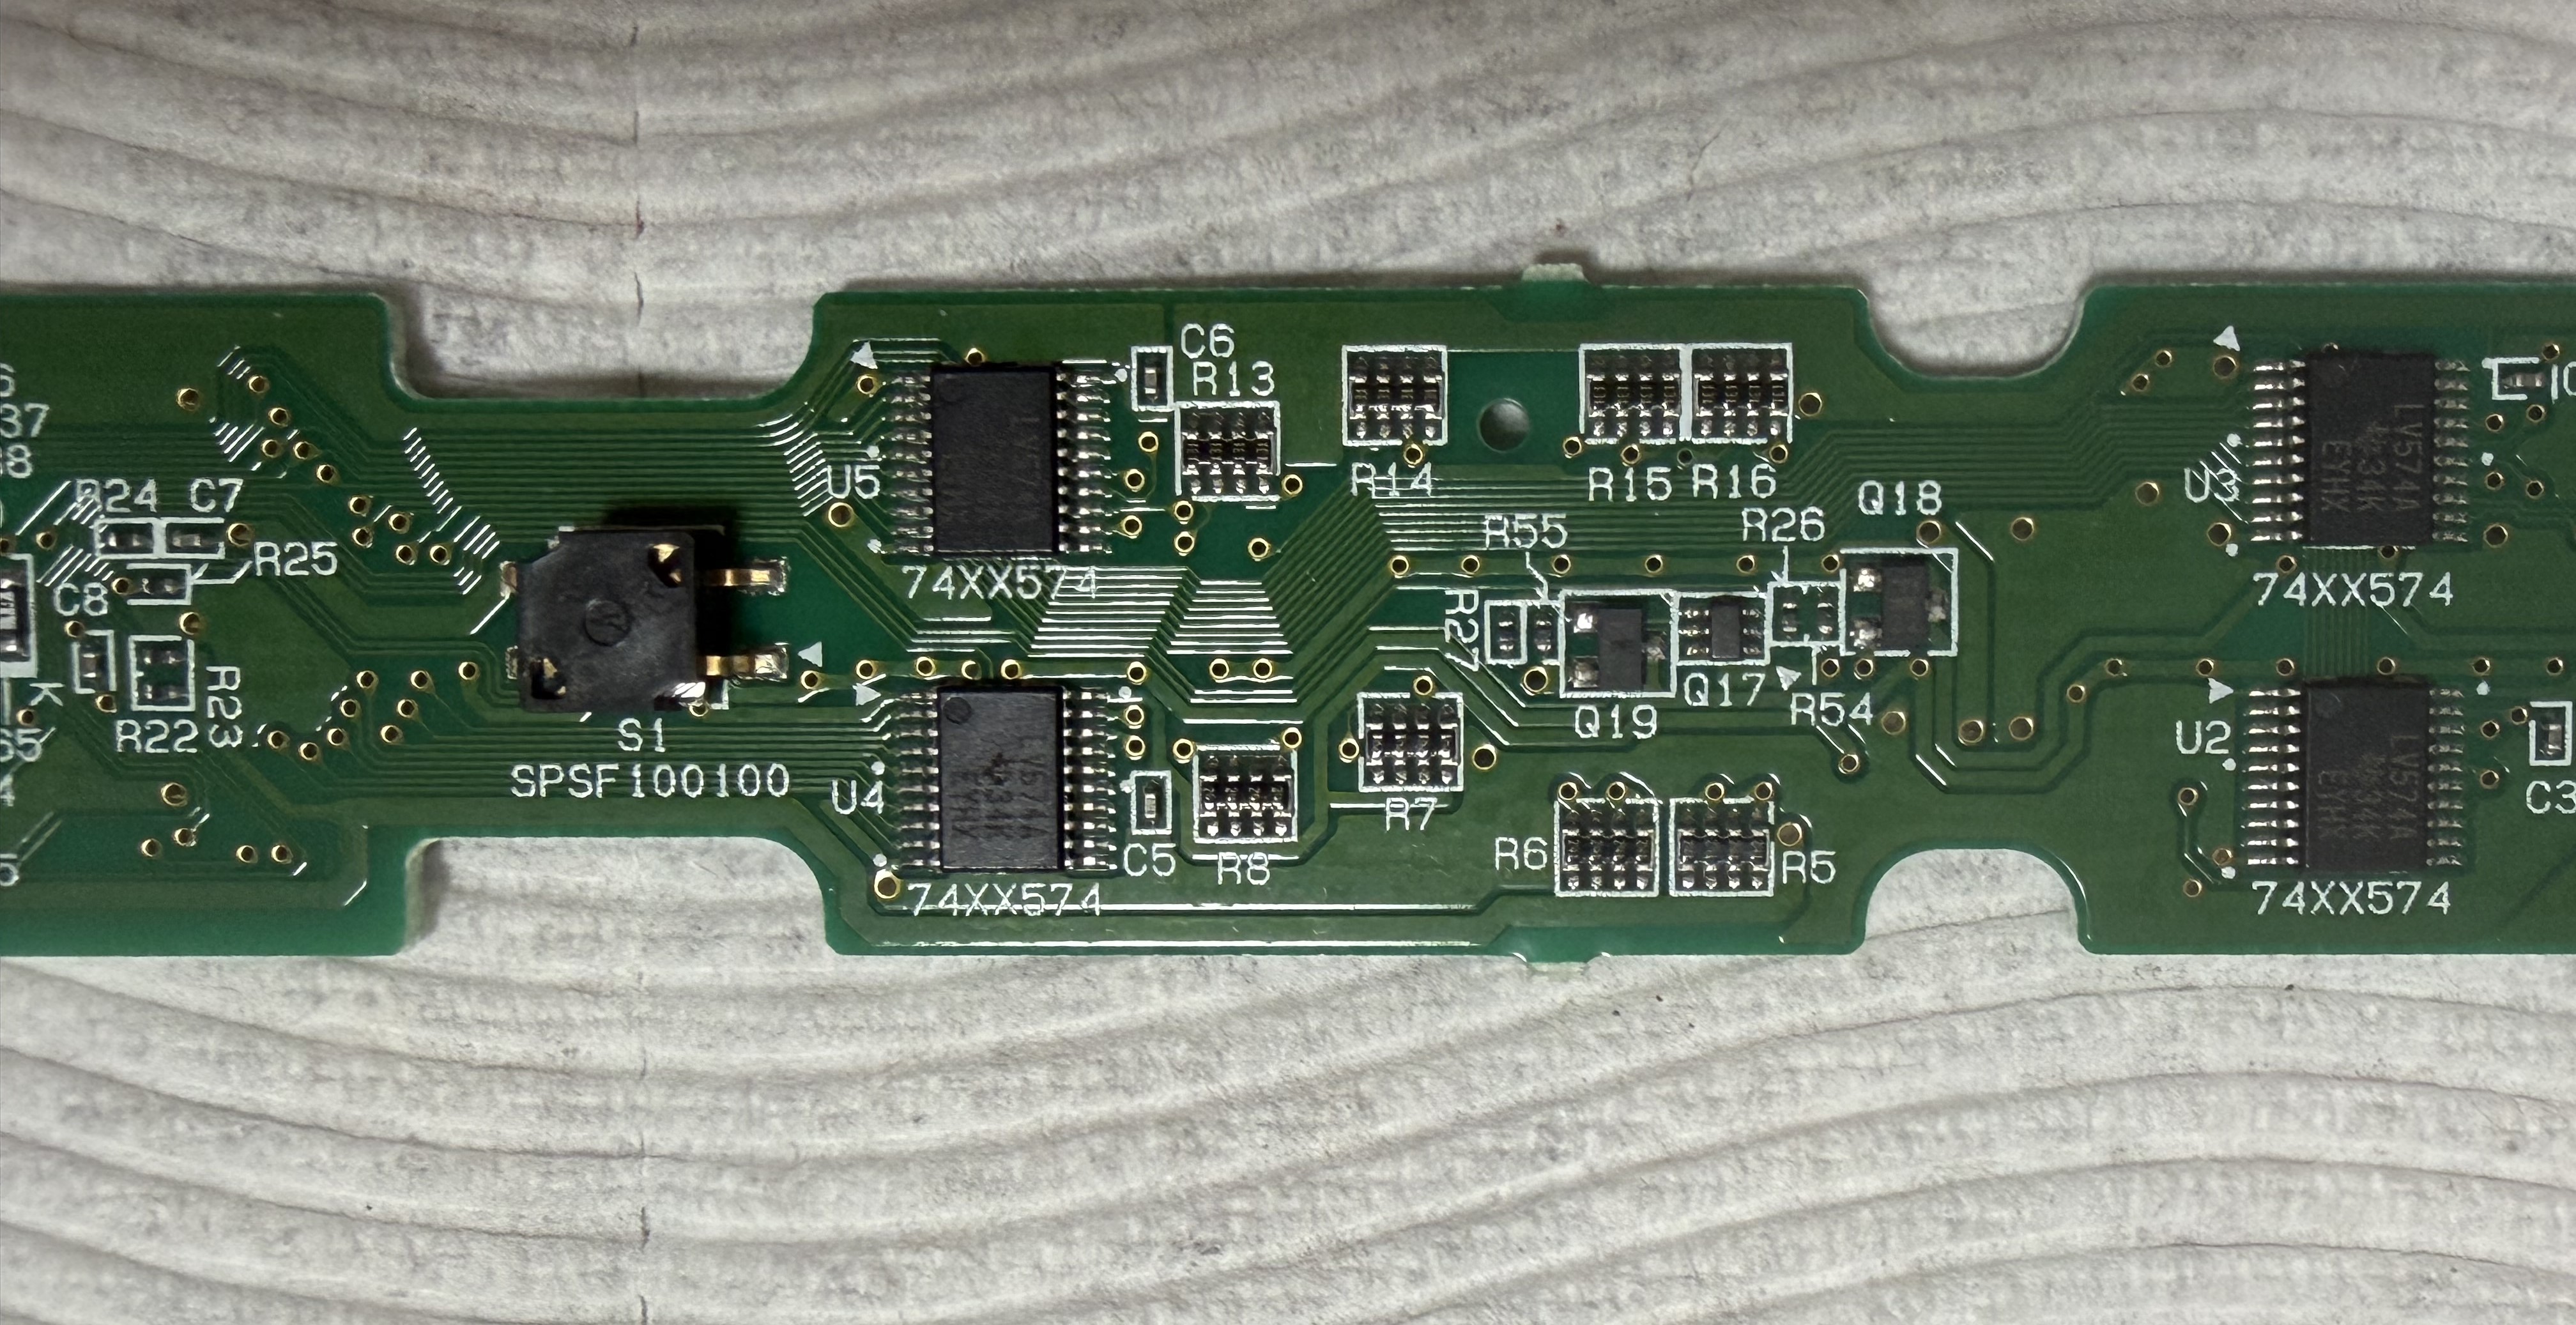
The above image shows 4 ICs, marked LV574A. These are "Octal Edge-Triggered D-Type Flip-Flops With 3-State Outputs."
On the left, you can see a black box marked "S1." This may be the sensor that has the metal ball inside that determines direction.
You can also see multiple resistors marked with R.
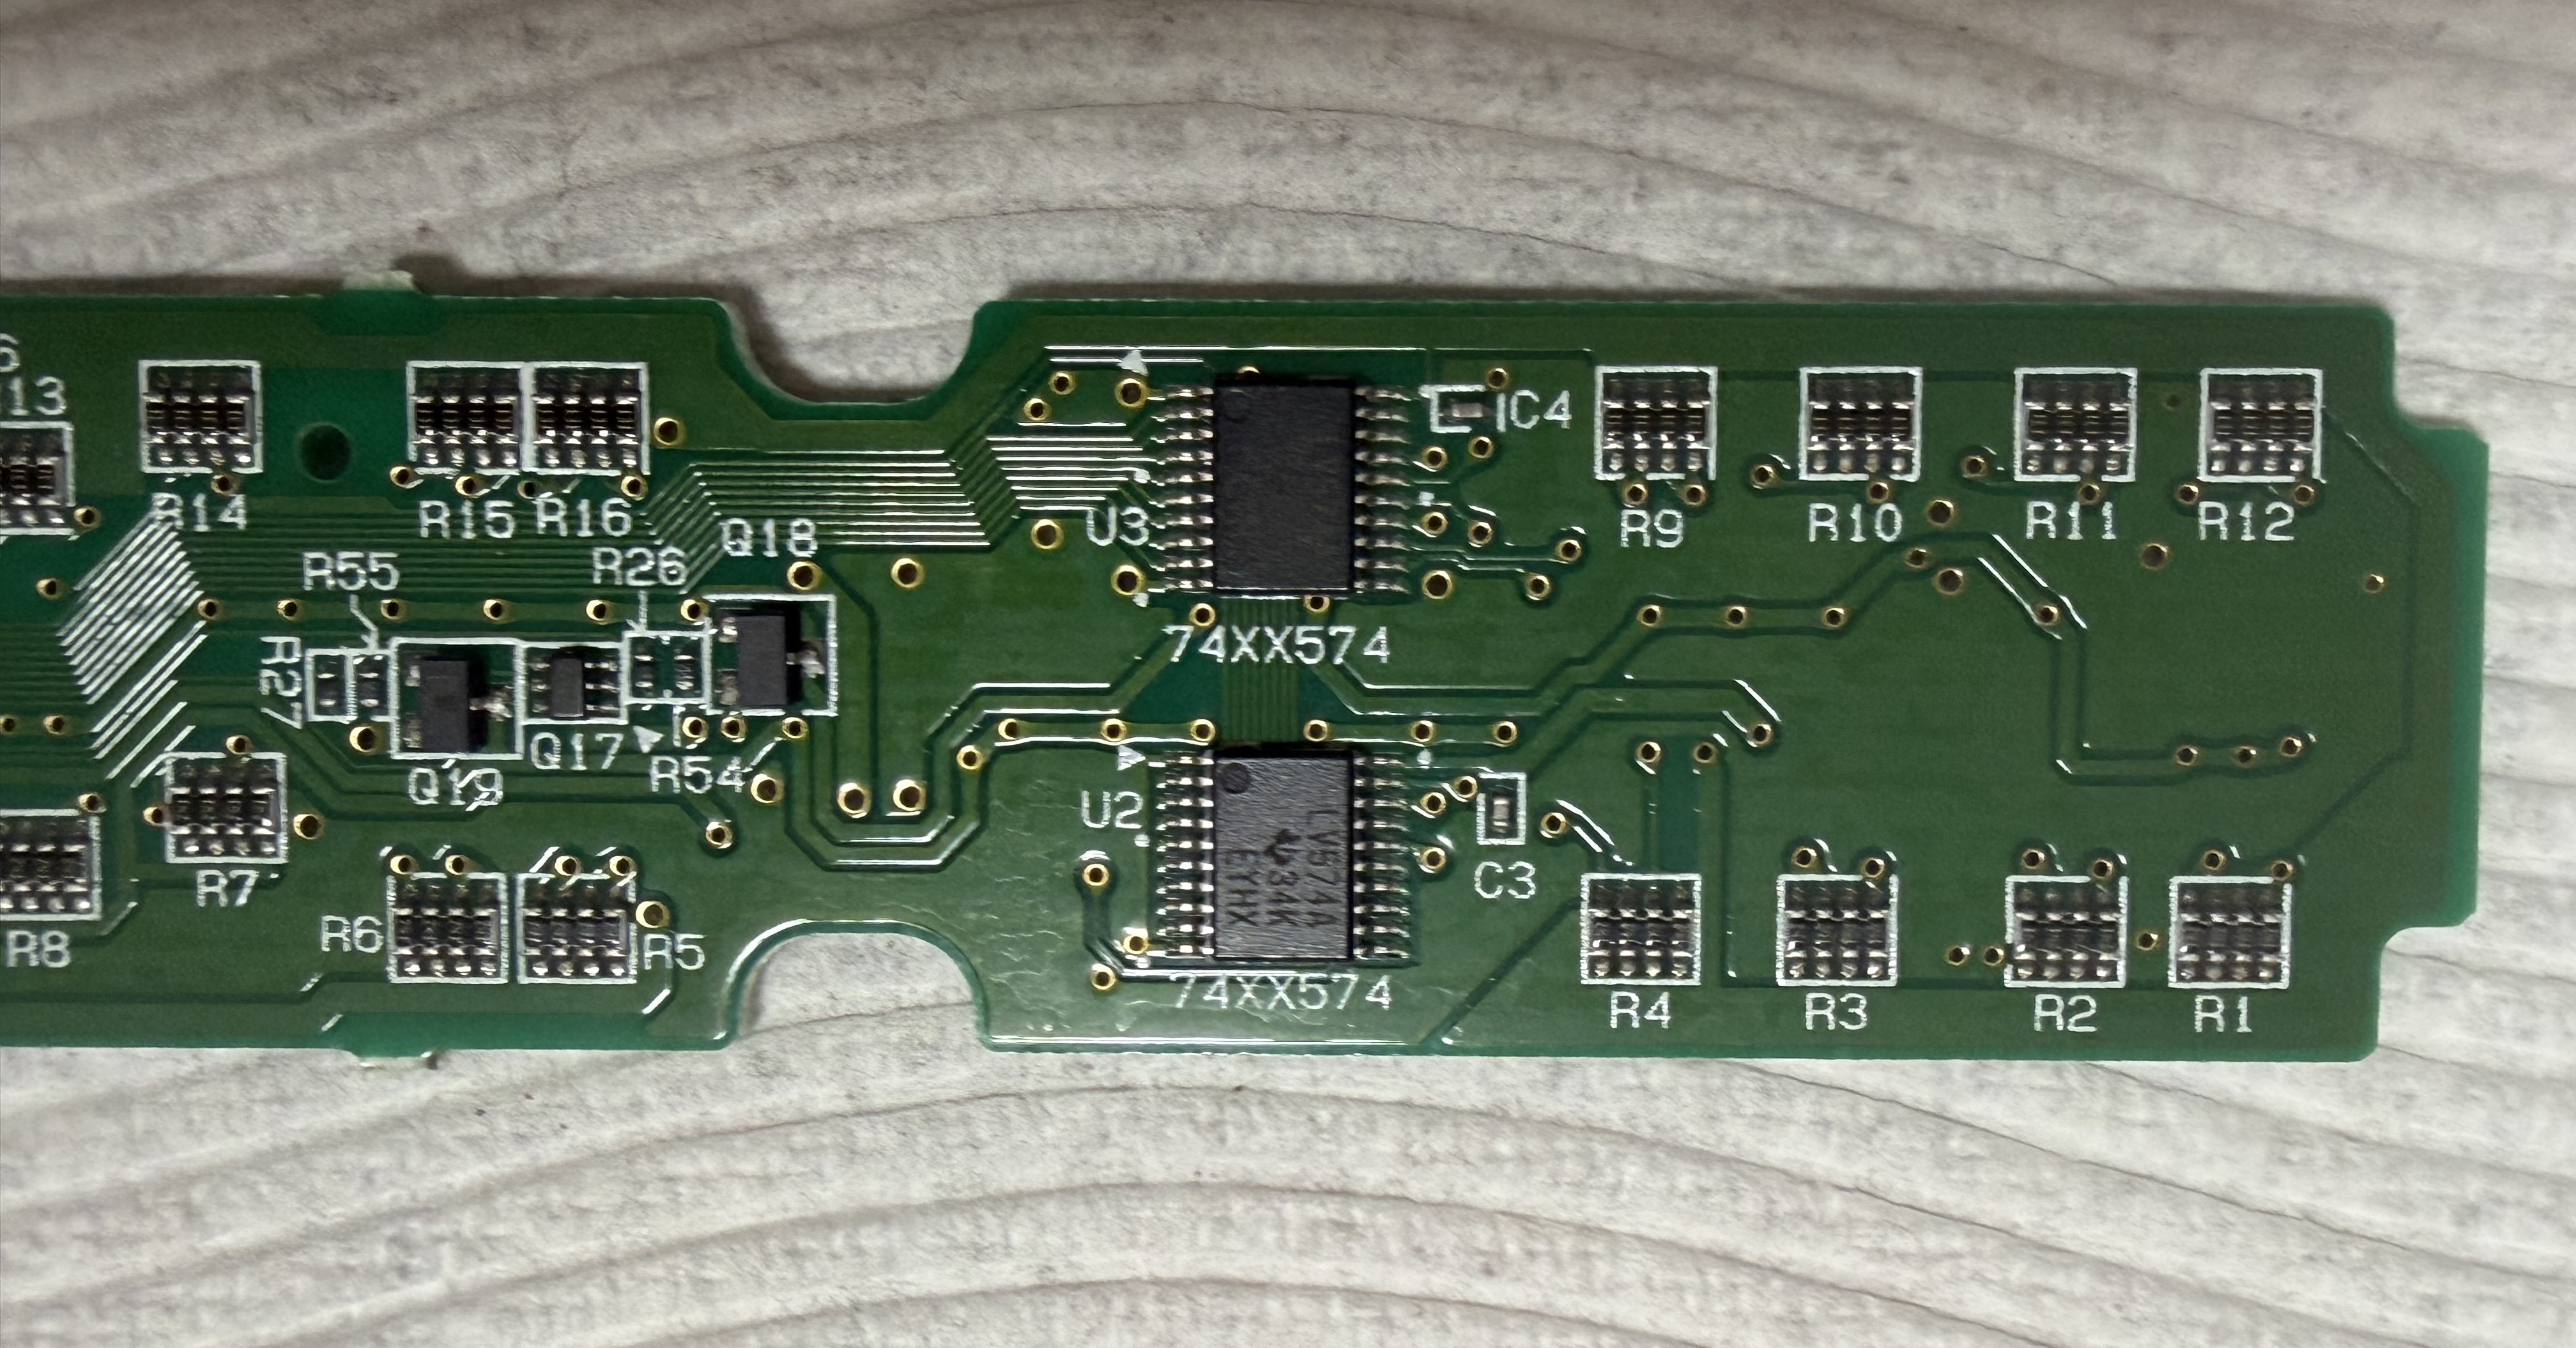
More resistors at the top of the wand.